21 Thanksgiving Appetizers Recipe
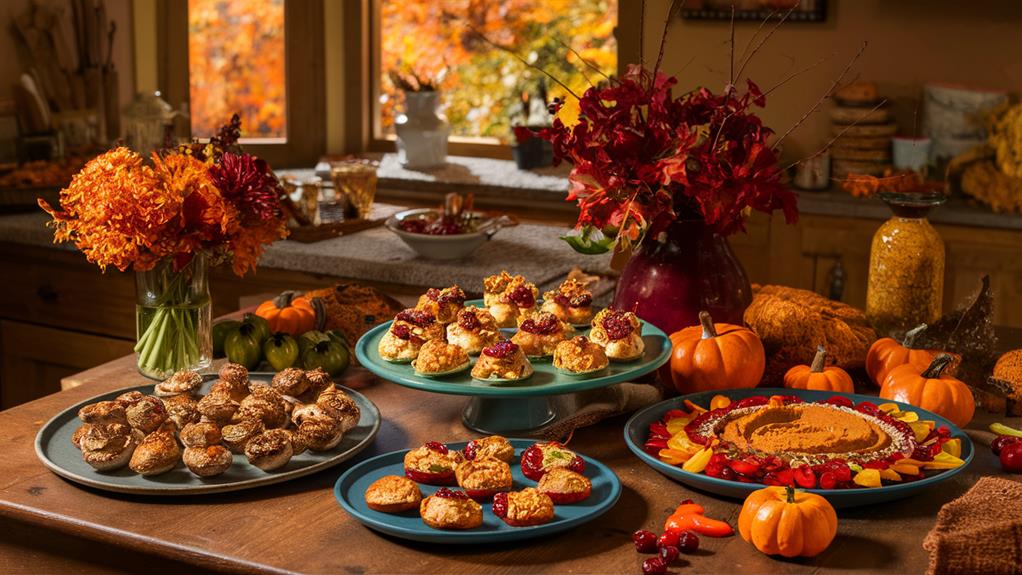
As you prepare for Thanksgiving, it’s important to consider how an array of appetizers can set the tone for an unforgettable meal. Imagine serving a spread that includes everything from baked brie with cranberries to mini crab cakes, each dish a blend of seasonal flavors and creative flair. These appetizers aren’t just starters; they’re a chance to impress your guests before the main event.
Let’s explore these 21 recipes that promise a delightful beginning to your Thanksgiving feast.
Baked Brie With Cranberries
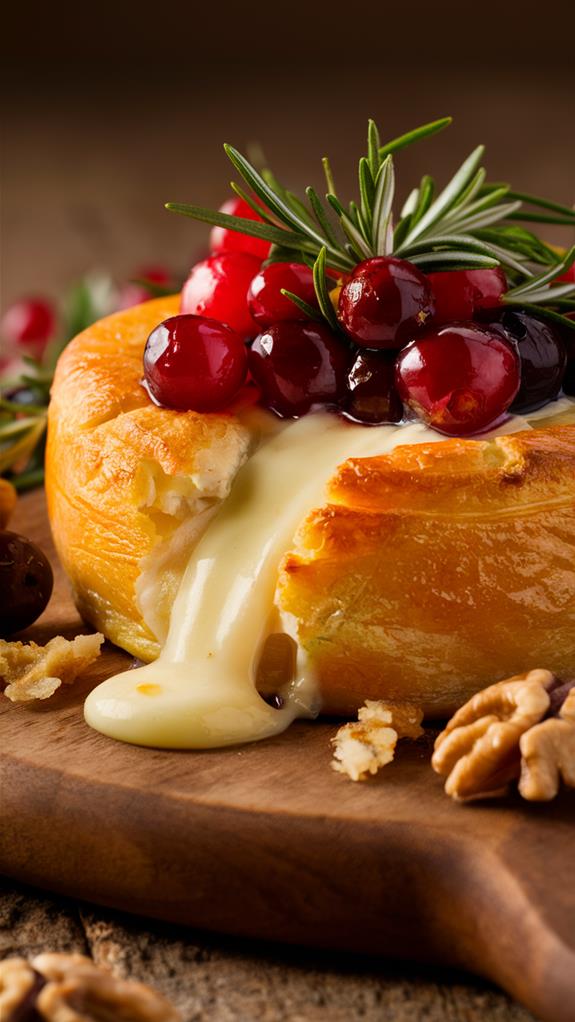
When planning a gathering or special occasion, finding a dish that stands out can set the tone for the entire event. Baked brie with cranberries is an exceptional appetizer choice that combines both visual appeal and a complex blend of flavors. This dish marries the creamy richness of brie with the tart, sweet notes of cranberries, resulting in a culinary delight that will impress your guests and elevate your appetizer offerings.
Not only is baked brie with cranberries visually stunning, but it’s also incredibly easy to prepare, making it accessible for both novice and experienced cooks. The simplicity of this dish allows the flavors to shine, while the addition of nuts and herbs adds texture and aroma. Whether you’re hosting a casual get-together or a formal dinner, this appetizer will surely be a hit.
Ingredients:
- 1 wheel of brie (approximately 8 ounces)
- 1/2 cup cranberry sauce
- 1/4 cup chopped pecans or walnuts
- 1 teaspoon fresh rosemary, chopped
- Slices of crusty bread or crackers
Cooking Instructions:
- Preheat the oven to 350°F (175°C).
- Line a baking sheet with parchment paper.
- Place the brie wheel on the prepared baking sheet.
- Evenly spread the cranberry sauce over the top of the brie.
- Sprinkle the chopped pecans or walnuts over the cranberry sauce.
- Add a dash of chopped rosemary on top for added aroma.
- Bake in the preheated oven for 10-15 minutes, until the brie is soft and gooey.
- Once baked, let the brie cool for a minute before carefully transferring it to a serving platter.
- Surround the brie with slices of crusty bread or crackers for serving.
Extra Tips:
When selecting your brie, consider the level of creaminess you prefer; a softer brie will melt more easily, while a firmer brie will hold its shape better.
If you opt to remove the rind for a smoother texture, do so gently to avoid losing too much of the cheese. Additionally, keep an eye on the brie while baking to prevent it from melting completely and losing its form.
Adjust the amount of cranberry sauce and nuts to suit your taste, and feel free to experiment with different herbs like thyme or sage for a unique twist.
Stuffed Mushrooms
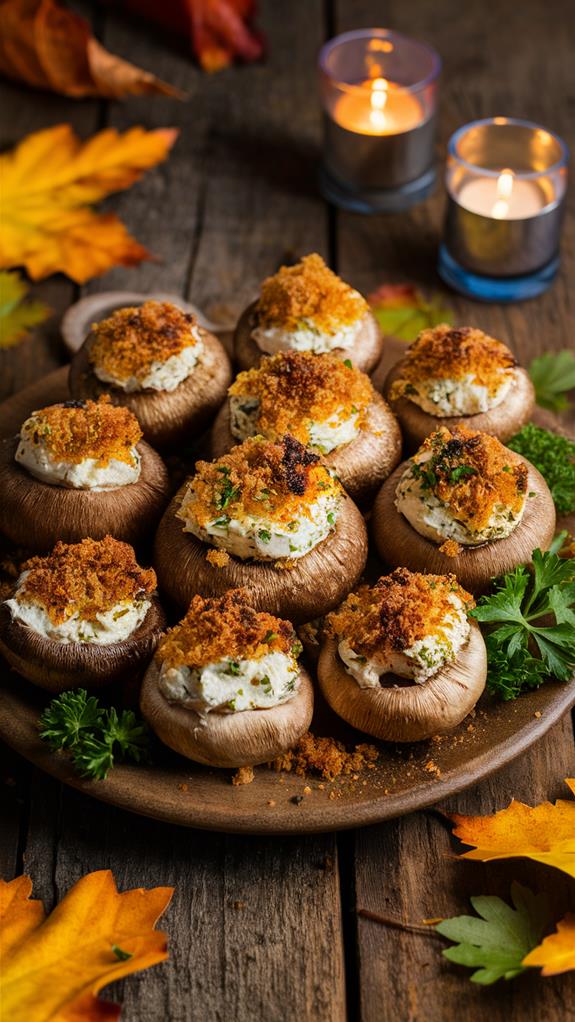
Stuffed mushrooms are a classic appetizer that never fails to impress. They offer an inviting blend of textures and flavors that are sure to delight your guests, making them a perfect addition to any gathering. The key to their appeal lies in the contrast between the tender, savory mushroom caps and the rich, flavorful filling.
Whether you’re hosting a casual get-together or a more formal event, stuffed mushrooms add a touch of elegance without requiring a lot of fuss. Their small size makes them easy to handle and enjoy, while their versatile filling allows for endless customization. By choosing fresh, firm mushrooms such as cremini or white button, you ensure that they hold up beautifully during baking, providing the perfect vessel for your chosen stuffing.
Ingredients:
- 1 lb cremini or white button mushrooms
- 2 tablespoons olive oil
- 3 cloves garlic, minced
- 1 small onion, finely chopped
- 1/4 cup chopped fresh parsley or thyme
- 1/2 cup breadcrumbs
- 1/2 cup cream cheese or grated Parmesan
- Optional: 1/2 cup cooked sausage or spinach
- Salt and pepper to taste
Cooking Instructions:
- Preheat the oven to 375°F (190°C).
- Remove the stems from the mushrooms and clean the caps. Finely chop the stems.
- Heat olive oil in a pan over medium heat. Add chopped mushroom stems, garlic, and onions. Sauté until softened.
- Stir in the herbs and cook for an additional minute.
- In a bowl, combine the sautéed mixture with breadcrumbs and cream cheese or Parmesan. Mix well.
- If desired, incorporate cooked sausage or spinach into the filling mixture.
- Season the filling with salt and pepper to taste.
- Spoon the filling generously into each mushroom cap, packing it tightly.
- Arrange the stuffed mushrooms on a baking sheet.
- Bake for about 20 minutes until the tops are golden and the mushrooms are tender.
- Serve warm.
Extra Tips:
For the best results, select mushrooms of similar size to ensure even cooking. If you’re using larger mushrooms, you may need to adjust the baking time slightly.
When cleaning the mushrooms, use a damp paper towel to gently wipe them clean instead of rinsing them under water, as mushrooms can absorb moisture and become soggy.
Feel free to experiment with other herbs and spices to tailor the flavor profile to your liking. Additionally, you can prepare the filling a day in advance and store it in the refrigerator, making it a convenient option for busy hosts.
Deviled Eggs
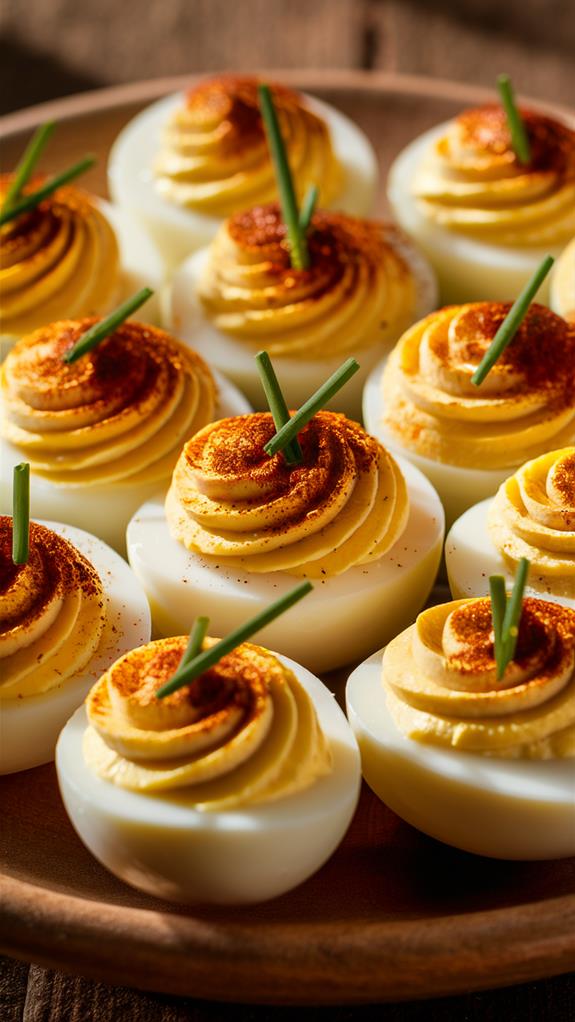
Deviled eggs are a staple appetizer that have graced many gatherings with their classic charm and irresistible taste. They offer a perfect blend of creamy and tangy flavors, making them a delightful addition to any Thanksgiving spread. This dish isn’t only a crowd-pleaser but also incredibly easy to prepare, ensuring that you can spend more time enjoying the company of your guests.
The simplicity of deviled eggs is part of their enduring appeal. With just a few ingredients, you can create a dish that looks as impressive as it tastes. Whether you’re a seasoned cook or a beginner in the kitchen, this recipe will guide you through the process to achieve perfectly smooth and flavorful deviled eggs every time.
Ingredients:
- 12 large eggs
- 1/2 cup mayonnaise
- 1 tablespoon Dijon mustard
- 1 teaspoon white vinegar
- 1/2 teaspoon salt
- 1/4 teaspoon black pepper
- Paprika for garnish
- Chopped chives for garnish (optional)
Cooking Instructions:
- Place the eggs in a single layer in a large saucepan. Cover them with water, about an inch above the eggs.
- Bring the water to a boil over medium-high heat. Once boiling, remove the pan from heat and cover with a lid. Let the eggs sit for 12 minutes.
- After 12 minutes, transfer the eggs to a bowl of ice water to cool for at least 5 minutes. This will make peeling easier.
- Carefully peel the eggs and slice them in half lengthwise. Remove the yolks and place them in a mixing bowl.
- Mash the yolks with a fork until finely crumbled. Add the mayonnaise, Dijon mustard, vinegar, salt, and pepper. Mix until smooth and creamy.
- Spoon or pipe the yolk mixture back into the egg white halves, creating a neat mound for each.
- Garnish with a sprinkle of paprika and chopped chives, if using.
Extra Tips:
For perfectly smooth deviled eggs, ensure the yolk mixture is well-mashed and free of lumps. Adjust the seasoning to suit your taste—adding a little more mustard or a dash of hot sauce can enhance the flavor profile.
If you’re making these ahead of time, store the filled eggs in the refrigerator until ready to serve, ensuring they stay fresh and delicious. Consider doubling the recipe, as these deviled eggs tend to disappear quickly!
Spinach Artichoke Dip
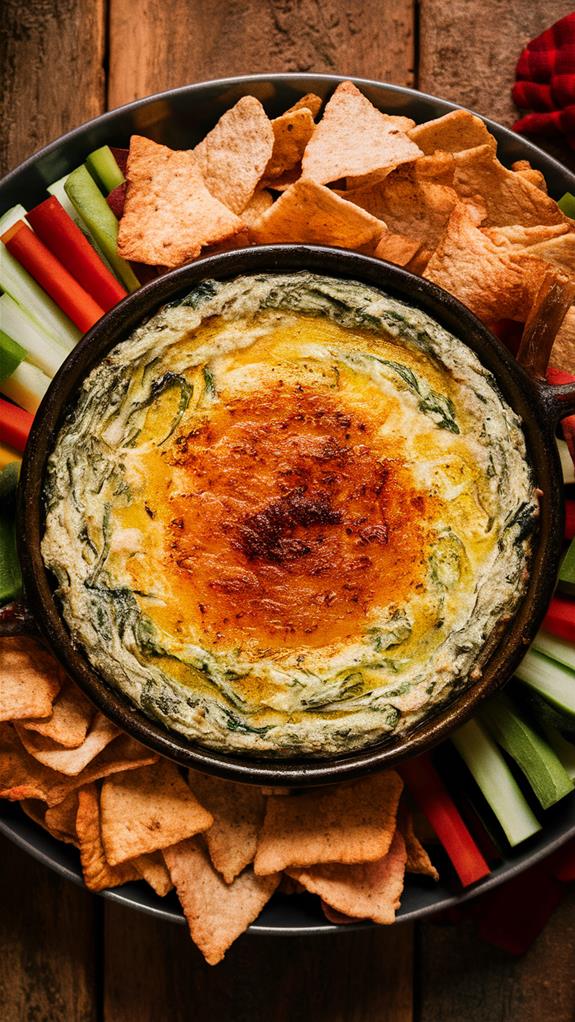
Transform your Thanksgiving appetizer offerings by adding a warm, creamy spinach artichoke dip that promises to be a crowd-pleaser. Picture the excitement of your guests as they dive into this savory delight, using a crispy, toasted baguette or crunchy tortilla chip to scoop up every bit of its deliciousness.
This dip combines the earthy taste of spinach with the unique tang of artichoke hearts, all enveloped in a rich, cheesy base that exudes comfort and satisfaction. Not only does this dip offer a delightful combination of flavors, but it also provides the convenience of easy preparation.
You can whip it up ahead of time, allowing you to focus on other Thanksgiving duties. Ensuring it’s served straight from the oven will create a warm and inviting welcome for your guests as they enter your home. This memorable appetizer is sure to leave a lasting impression.
Ingredients:
- 2 cups fresh spinach
- 1 cup chopped artichoke hearts
- 8 oz cream cheese, softened
- 1/2 cup sour cream
- 1/4 cup mayonnaise
- 1/2 cup grated Parmesan cheese
- 1/2 cup shredded mozzarella cheese
- 2 cloves garlic, minced
- Salt to taste
- Pepper to taste
- Extra cheese for topping
Cooking Instructions:
- Preheat your oven to 350°F (175°C).
- Sauté the fresh spinach in a skillet over medium heat until wilted.
- In a large mixing bowl, combine the softened cream cheese, sour cream, and mayonnaise.
- Add the grated Parmesan cheese and shredded mozzarella cheese to the mixture.
- Stir in the sautéed spinach and chopped artichoke hearts.
- Season with minced garlic, salt, and pepper, mixing well.
- Transfer the mixture to a baking dish.
- Sprinkle extra cheese on top as desired.
- Bake in the preheated oven for 20-25 minutes, until the top is bubbly and golden brown.
- Serve hot with toasted baguette slices or tortilla chips.
Extra Tips:
For a twist on flavor, consider adding a pinch of chili flakes or a dash of lemon juice to the dip mixture before baking. You can also experiment with different cheeses, such as Gruyère or white cheddar, to customize the taste.
If you’re short on time, use frozen spinach instead of fresh; just make sure to thaw and drain it well to avoid excess moisture. Remember to let the dip cool slightly before serving to ensure your guests can enjoy it without burning their mouths.
Mini Crab Cakes
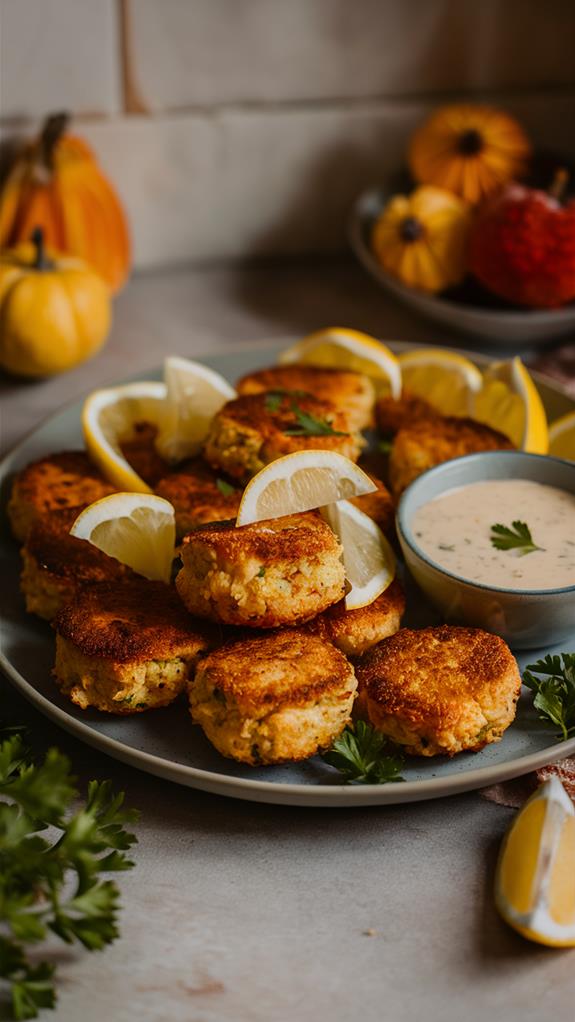
Imagine the satisfaction of biting into a mini crab cake, where the golden, crispy exterior unveils a moist and flavorful center brimming with succulent crab meat.
These delectable appetizers aren’t just a feast for the taste buds but also a visual treat, making them an ideal addition to your Thanksgiving spread. Their elegant appearance and rich taste are sure to impress your guests and elevate your festive table.
Crafting these mini delights is simpler than you might think, requiring only a handful of ingredients. With a bit of preparation, you can have these ready to serve without any stress. Their versatility also makes them a fantastic make-ahead option, allowing you to focus on enjoying the day with your loved ones.
Ingredients:
- 1 lb fresh crab meat
- 1 cup breadcrumbs
- 1/4 cup mayonnaise
- 1 egg
- 1 tablespoon Dijon mustard
- 1 teaspoon Worcestershire sauce
- 1 teaspoon Old Bay seasoning
- 2 tablespoons chopped parsley
- Oil for frying
Cooking Instructions:
- In a large bowl, gently combine the crab meat, breadcrumbs, mayonnaise, egg, Dijon mustard, Worcestershire sauce, Old Bay seasoning, and chopped parsley.
- Mix the ingredients carefully to maintain the crab meat’s texture.
- Form the mixture into small patties, ensuring they’re compact but not too dense.
- Heat oil in a skillet over medium heat.
- Once the oil is hot, place the patties in the skillet.
- Cook each side for about 3-4 minutes or until golden brown.
- Remove the patties and drain on paper towels to eliminate excess oil.
- Serve with tartar sauce or a squeeze of fresh lemon for added flavor.
Extra Tips:
For the best results, use fresh crab meat, as it will provide the most authentic flavor and texture.
When forming the patties, be gentle to avoid compressing them too much, which can make them dense. If you’re planning to make them ahead of time, simply reheat them in the oven at 350°F (175°C) for about 10 minutes before serving to keep them crispy.
Enjoy these mini crab cakes as a delightful appetizer that will surely be the talk of your gathering!
Sweet Potato Bites
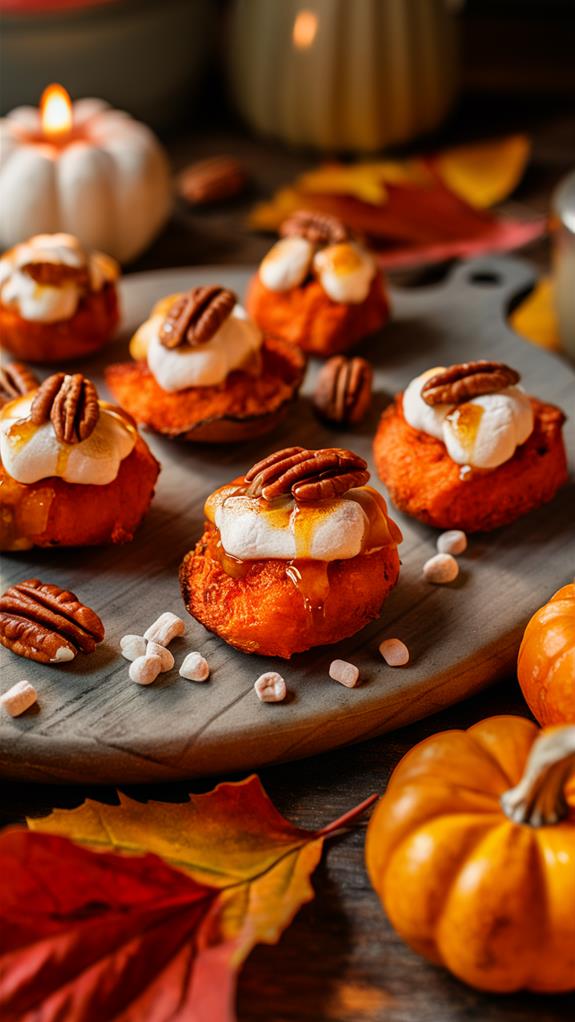
Sweet potato bites are an irresistible addition to any Thanksgiving appetizer spread. Their harmonious blend of sweet and savory elements makes them a crowd-pleaser that guests will adore.
Beyond their delicious taste, these bites are also incredibly simple to prepare, allowing you to focus on enjoying the holiday rather than stressing in the kitchen.
To achieve the perfect texture, slice sweet potatoes into thin rounds, approximately ¼ inch thick. Toss them in olive oil with a touch of salt and pepper to enhance their natural flavors. Baking these slices will result in tender, slightly caramelized bites that serve as the perfect base for a variety of toppings.
Ingredients:
- 2 large sweet potatoes
- 2 tablespoons olive oil
- ½ teaspoon salt
- ¼ teaspoon black pepper
- 4 ounces goat cheese
- 4 slices bacon, cooked and crumbled
- ¼ cup chopped pecans
- 2 tablespoons maple syrup or honey
Instructions:
- Preheat the oven to 400°F (200°C).
- Wash and dry the sweet potatoes. Slice them into ¼ inch thick rounds.
- In a large bowl, toss the sweet potato slices with olive oil, salt, and pepper.
- Arrange the slices in a single layer on a baking sheet.
- Bake for 20-25 minutes, or until tender and edges are slightly caramelized.
- Remove from the oven and let cool slightly.
- Spread a small dollop of goat cheese on each sweet potato round.
- Sprinkle crumbled bacon and chopped pecans over the goat cheese.
- Drizzle with maple syrup or honey just before serving.
For best results, ensure the sweet potato rounds are uniform in thickness to promote even cooking.
If you want to prepare in advance, bake the sweet potatoes and prepare toppings separately, then assemble just before serving for optimal freshness.
Experiment with different toppings to create a variety of flavors and textures, and don’t hesitate to adjust seasoning to suit your taste.
Cheese and Charcuterie Board
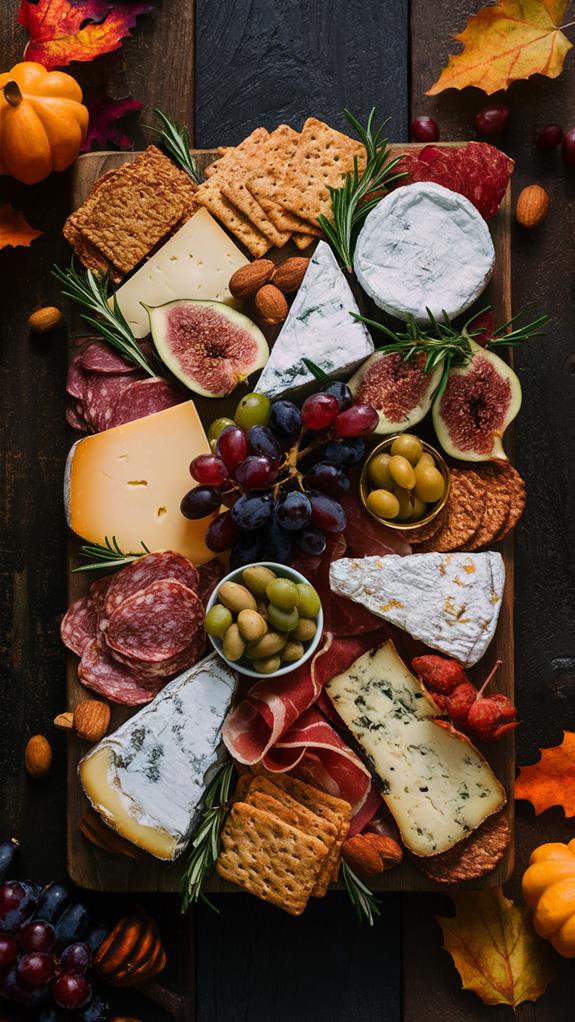
Creating a cheese and charcuterie board is an artful way to elevate your Thanksgiving feast, offering a delightful mix of flavors and textures that will captivate your guests. This board isn’t only a feast for the palate but also a visual masterpiece, making it a centerpiece that sparks conversation.
By carefully selecting a variety of cheeses, cured meats, and complementary accompaniments, you can cater to different taste preferences while ensuring an elegant presentation.
The beauty of a cheese and charcuterie board lies in its versatility. It can be customized to suit any occasion or dietary preferences. Whether you’re hosting a large gathering or an intimate dinner, this board can be scaled to meet your needs.
So, let your creativity flow as you assemble a board that’s as delicious as it’s beautiful.
Ingredients:
- 200g creamy brie cheese
- 200g sharp cheddar cheese
- 150g tangy blue cheese
- 100g prosciutto
- 100g salami
- 100g chorizo
- 1 cup grapes
- 4 figs, halved
- 1 apple, sliced
- 1/2 cup almonds
- 1/2 cup walnuts
- 1/4 cup honey
- 1/4 cup fig jam
- Assorted crackers
- Artisan bread
Instructions:
- Choose a large wooden board or platter as the base for your arrangement.
- Slice the brie, cheddar, and blue cheese into portions and place them on the board, ensuring space between each type for easy access.
- Roll or fold the prosciutto, salami, and chorizo, and arrange them around the cheeses.
- Scatter grapes, halved figs, and apple slices across the board for added sweetness and color.
- Add almonds and walnuts in small clusters to provide a crunchy texture.
- Place small dishes of honey and fig jam on the board as spreads.
- Arrange a variety of crackers and slices of artisan bread around the edges of the board.
- Include small knives and spoons for serving the cheeses and spreads.
Extra tips: When preparing your cheese and charcuterie board, consider the flow and accessibility for your guests. Ensure that each element is easy to reach and that there are enough utensils for serving.
Feel free to adjust the ingredients based on seasonal availability or personal preferences. Additionally, allowing cheeses to reach room temperature enhances their flavors, so take them out of the refrigerator about 30 minutes before serving.
Your board should feel abundant and inviting, encouraging guests to explore and enjoy each component.
Bacon-Wrapped Asparagus
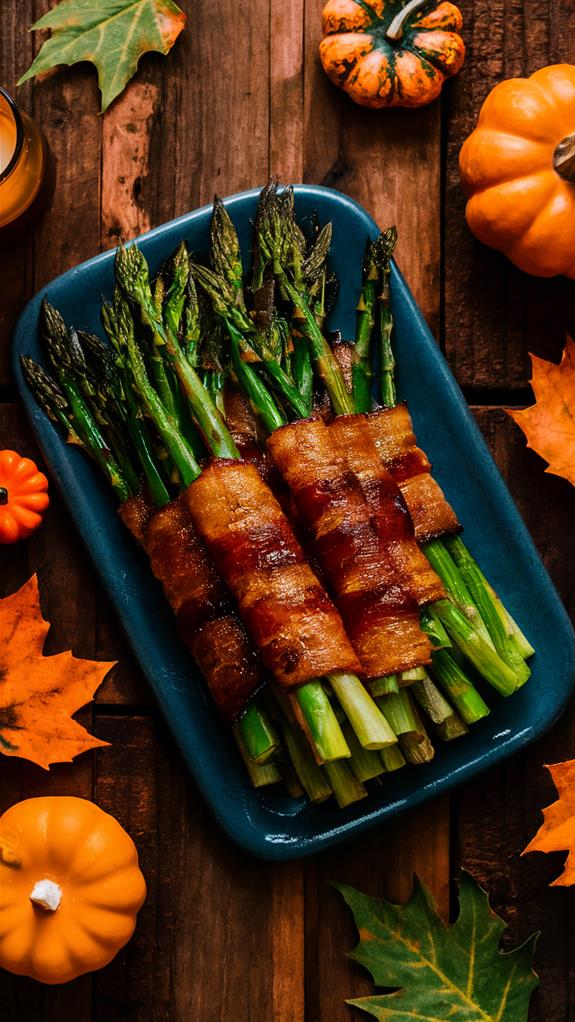
Bacon-wrapped asparagus is a savory delight that brings a touch of elegance and flavor to your Thanksgiving spread. This simple yet impressive appetizer combines the crispness of asparagus with the smoky, salty goodness of bacon, making it a favorite among guests.
Not only does it enhance the visual appeal of your table, but it also introduces a blend of textures and flavors that pairs well with a variety of dishes.
The preparation of bacon-wrapped asparagus is straightforward, requiring only a few ingredients and minimal effort. It’s an excellent choice for those who wish to present a gourmet dish without spending hours in the kitchen.
With its vibrant green hues peeking through the golden brown bacon, this dish is as pleasing to the eyes as it’s to the palate.
Ingredients:
- 1 pound fresh asparagus spears
- 12 slices of your favorite bacon
- 2 tablespoons olive oil
- 1 teaspoon garlic powder
- 1/2 teaspoon black pepper
Cooking Instructions:
- Preheat your oven to 400°F (200°C).
- Trim the woody ends off the asparagus spears.
- Wrap one slice of bacon snugly around each asparagus spear, leaving some of the green tips exposed.
- Line a baking sheet with parchment paper.
- Place the wrapped asparagus on the sheet, ensuring they aren’t touching each other.
- In a small bowl, mix olive oil, garlic powder, and black pepper.
- Brush each wrapped spear with the olive oil mixture.
- Bake in the preheated oven for 20-25 minutes or until the bacon is crispy and the asparagus is tender.
- Remove from the oven and serve hot.
Extra Tips:
For the best results, choose thin asparagus spears, as they cook more evenly with the bacon.
If you prefer extra-crispy bacon, consider partially cooking the bacon slices before wrapping them around the asparagus.
Additionally, experiment with adding a sprinkle of parmesan cheese or a drizzle of balsamic glaze before serving for a gourmet twist.
Pumpkin Hummus
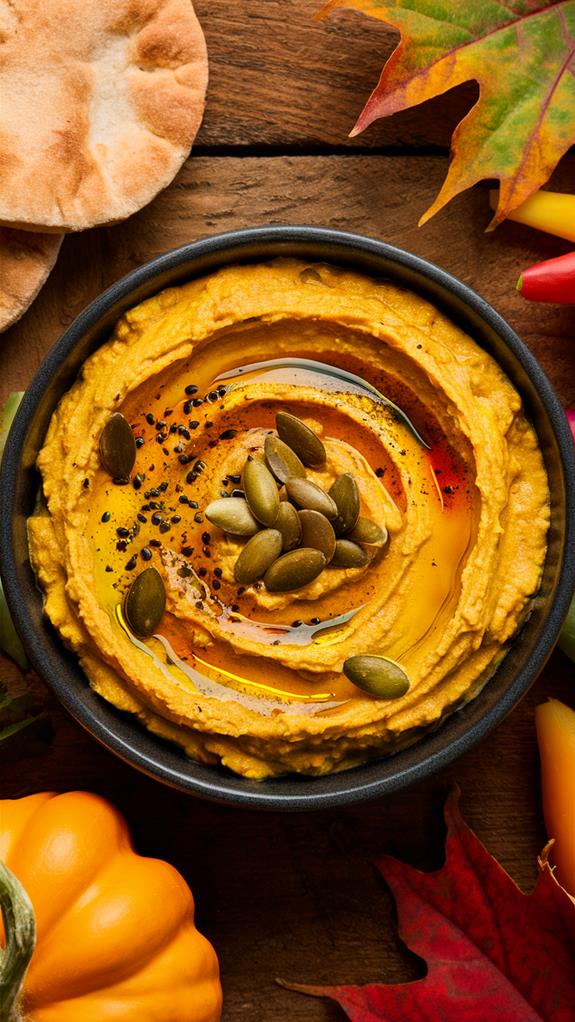
Pumpkin hummus brings a touch of autumn warmth to any table, making it an ideal choice for a festive Thanksgiving appetizer. This variation on traditional hummus offers a creamy, rich flavor profile that seamlessly blends the earthy essence of pumpkin with the classic taste of chickpeas and tahini. Not only is it a delicious treat, but it also introduces a unique and seasonal twist that will impress your guests.
The simplicity of this recipe allows you to prepare it quickly, leaving more time to enjoy the company of your friends and family. Using readily available ingredients, you can create a flavorful dish that complements other holiday favorites. Whether served with fresh vegetables, pita bread, or your choice of crackers, pumpkin hummus is a versatile addition to your holiday spread.
Ingredients:
- 1 cup canned pumpkin
- 1 can (15 oz) chickpeas, drained and rinsed
- 1/4 cup tahini
- 2 tablespoons lemon juice
- 2 cloves garlic
- 2 tablespoons olive oil
- 1 teaspoon ground cumin
- Salt, to taste
- Paprika, for garnish
Cooking Instructions:
- Drain and rinse the chickpeas thoroughly to ensure a smooth texture.
- In a food processor, combine chickpeas, canned pumpkin, tahini, lemon juice, and garlic.
- Blend the mixture until it reaches a creamy consistency.
- Slowly drizzle in the olive oil while the processor is running to emulsify the hummus.
- Add cumin and salt to taste, then blend again to incorporate the flavors.
- Transfer the hummus to a serving bowl.
- Top with a drizzle of olive oil and a sprinkle of paprika for color and added flavor.
Extra Tips:
For the best results, ensure your chickpeas are well-drained and rinsed. This step is crucial for achieving the desired creamy texture.
If you prefer a spicier version, consider adding a pinch of cayenne pepper or additional garlic for more kick.
Additionally, pumpkin hummus can be made a day in advance, allowing the flavors to meld together. Just store it in an airtight container in the fridge and give it a quick stir before serving. Enjoy your festive creation!
Prosciutto-Wrapped Melon

Prosciutto-wrapped melon is a delightful appetizer that brings a touch of sophistication to any gathering. The combination of the sweet, juicy melon with the savory, salty prosciutto creates a harmonious balance that’s both refreshing and indulgent. This dish is a nod to the classic Italian palate, where simplicity and quality ingredients reign supreme.
Perfect for entertaining, prosciutto-wrapped melon isn’t only visually stunning but also incredibly easy to prepare. It’s an ideal choice for those looking to impress guests without spending hours in the kitchen. With the right presentation and a few extra touches, this appetizer will certainly be a standout addition to your holiday table.
Ingredients:
- 1 ripe cantaloupe or honeydew melon
- 12-16 thin slices of prosciutto
- Balsamic glaze (optional)
- Fresh basil leaves (optional)
Instructions:
- Select a ripe cantaloupe or honeydew melon.
- Cut the melon in half and remove the seeds.
- Slice the melon into bite-sized wedges, about 1-inch thick.
- Remove the rind from each wedge.
- Take a slice of prosciutto and wrap it around each melon wedge.
- Secure the prosciutto with a toothpick if needed.
- Arrange the wrapped melon on a serving platter.
- Drizzle balsamic glaze over the top, if using.
- Garnish with fresh basil leaves for added aroma and color, if desired.
Extra Tips:
When selecting your melon, make sure it’s fully ripe for optimal sweetness and juiciness. If you prefer a slightly different flavor profile, you can experiment with different types of melon, such as Galia or Crenshaw.
Additionally, using high-quality prosciutto is key to achieving the best taste. This dish can be prepared a few hours in advance and stored in the refrigerator, making it an excellent choice for stress-free entertaining.
Smoked Salmon Crostini

Smoked salmon crostini are a sophisticated yet simple appetizer that can effortlessly elevate any occasion, from holiday gatherings to casual get-togethers. They offer a delightful blend of flavors and textures, combining the rich, smoky essence of salmon with the satisfying crunch of toasted baguette slices.
This elegant dish is sure to impress your guests and requires minimal time in the kitchen, allowing you to enjoy the event without stress.
The recipe is straightforward and involves a few quality ingredients that come together beautifully. The creamy layer of cheese, the aromatic hint of dill, and the zesty touch of lemon bring out the best in the smoked salmon, creating a harmonious bite-sized treat.
Whether you’re hosting a large party or a small dinner, these crostini are an excellent choice to start the evening.
Ingredients:
- 1 baguette, sliced into thin rounds
- 8 oz cream cheese, softened
- 1 tablespoon fresh dill, finely chopped
- 8 oz smoked salmon, thinly sliced
- 1 lemon, juiced
- 2 tablespoons capers
Instructions:
- Preheat your oven to 375°F (190°C).
- Arrange the baguette slices on a baking sheet and toast them in the oven until golden brown, about 8-10 minutes.
- Allow the toasted baguette slices to cool on a wire rack.
- Spread a thin layer of softened cream cheese on each cooled baguette slice.
- Sprinkle a small amount of finely chopped dill over the cream cheese.
- Place a slice of smoked salmon on top of each prepared baguette slice.
- Squeeze a few drops of lemon juice over the salmon on each crostini.
- Garnish each crostini with a couple of capers.
- Arrange the crostini on a serving platter and serve immediately.
Extra Tips:
For the best flavor, choose high-quality smoked salmon and fresh dill. If you prefer a creamier texture, whip the cream cheese with a little cream or milk before spreading.
To make these crostini even more visually appealing, consider adding a small sprig of dill on top of each for decoration. Serve them as soon as possible after assembling to maintain the crispness of the bread.
For an extra touch of elegance, consider pairing these crostini with a light white wine or champagne.
Roasted Garlic Bruschetta
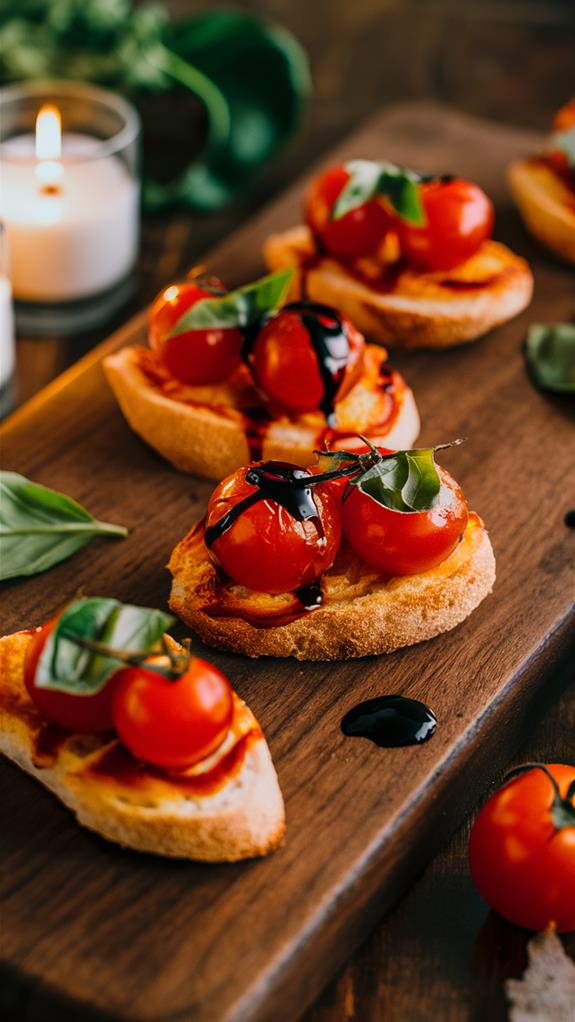
Roasted garlic bruschetta is a timeless appetizer that brings a burst of flavor to any occasion. The combination of roasted garlic with fresh tomatoes and basil creates a harmony of tastes that’s both comforting and sophisticated.
Whether you’re hosting a dinner party or simply enjoying a quiet evening at home, this dish promises to impress with its rich and aromatic profile.
The beauty of roasted garlic bruschetta lies in its simplicity, allowing each ingredient to shine. With a few basic components, you can create a dish that tantalizes the palate and leaves guests craving more.
The process of roasting garlic transforms it into a creamy, caramelized delight that elevates the bruschetta to new heights.
Ingredients:
- 1 fresh baguette
- 4 ripe tomatoes
- 1 bulb of garlic
- 1/4 cup fresh basil leaves
- 4 tablespoons olive oil
- 2 tablespoons balsamic vinegar
- Salt to taste
- Pepper to taste
Cooking Instructions:
- Preheat your oven to 400°F (200°C).
- Slice the top off the garlic bulb, drizzle with olive oil, and wrap it in foil.
- Roast garlic in the oven for 30-40 minutes until the cloves are soft and caramelized.
- While the garlic roasts, dice the tomatoes and chop the fresh basil.
- Combine diced tomatoes and basil in a bowl with a splash of olive oil, balsamic vinegar, salt, and pepper.
- Slice the baguette into thin rounds and lightly brush each slice with olive oil.
- Toast the baguette slices in the oven for about 5 minutes until golden.
- Once the garlic is ready, let it cool slightly, then squeeze the cloves into the tomato mixture.
- Stir the mixture well to incorporate the garlic.
- Top each toasted baguette slice with a generous spoonful of the tomato-garlic mixture.
- Serve immediately and enjoy!
Extra Tips:
For an added layer of flavor, consider topping the bruschetta with a sprinkle of grated Parmesan cheese or a drizzle of balsamic glaze.
If you prefer a little heat, add a pinch of red pepper flakes to the tomato mixture. Ensure the baguette slices are toasted just right; they should be crunchy on the outside but still soft enough to bite into easily.
Pecan Cheese Balls
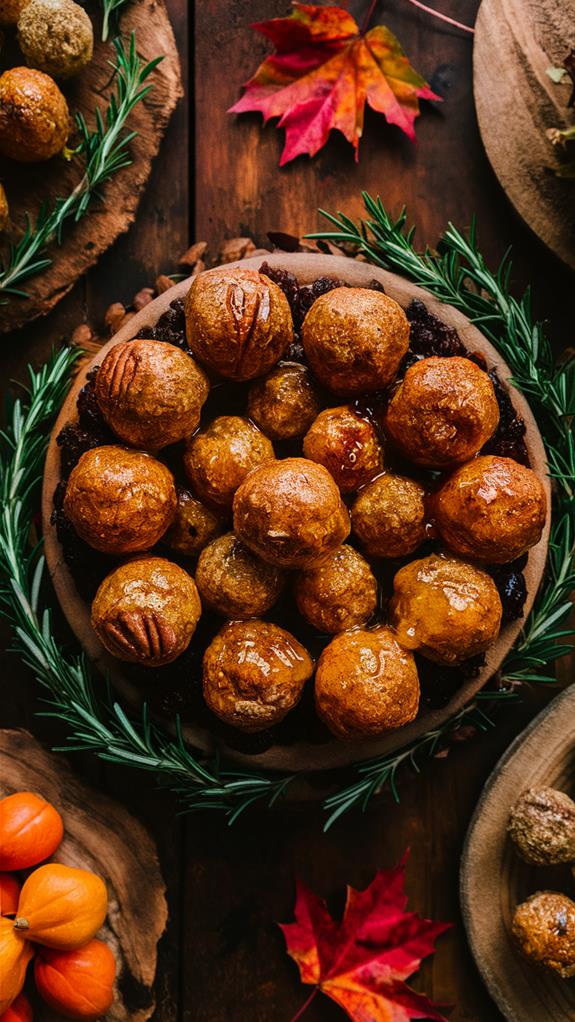
In the world of festive appetizers, pecan cheese balls are a standout favorite that promises to please any crowd. Their delectable flavor and appealing texture make them a go-to choice for gatherings, big or small. Not only are they delicious, but they’re also straightforward to make, ensuring you’re not spending hours in the kitchen when you could be enjoying the company of your guests.
The beauty of pecan cheese balls lies in their perfect balance of savory and creamy elements, highlighted by a delightful crunch. With just a few simple ingredients, you can create a dish that will have everyone reaching for more. Whether you’re hosting a holiday party or a casual get-together, these cheese balls are sure to be a hit.
Ingredients:
- 8 oz cream cheese, softened
- 1 cup sharp cheddar cheese, shredded
- 1/2 teaspoon garlic powder
- 2 tablespoons fresh chives, chopped
- 1 cup pecans, chopped
Cooking Instructions:
- Allow the cream cheese to soften at room temperature for easier mixing.
- In a medium-sized bowl, combine the softened cream cheese, shredded cheddar cheese, garlic powder, and chopped chives.
- Mix thoroughly until all ingredients are well-blended, ensuring an even distribution of flavors.
- Roll the mixture into bite-sized balls, approximately 1 inch in diameter.
- Spread the chopped pecans on a flat surface or shallow dish.
- Roll each cheese ball in the chopped pecans, ensuring they’re evenly coated.
- Place the coated cheese balls on a tray and chill in the refrigerator for at least 1 hour to firm up.
Extra Tips:
For the best results, make sure your cream cheese is adequately softened before mixing to ensure a smooth and creamy texture.
Chilling the cheese balls not only helps them hold their shape but also enhances the flavors, making them more pronounced. If you’re preparing these in advance, you can store them in an airtight container in the fridge; just be sure to take them out a few minutes before serving to let them reach optimal flavor.
Maple Glazed Brussels Sprouts

Maple glazed Brussels sprouts can transform your appetizer spread with their delightful blend of sweetness and savory tones. When paired alongside other savory dishes, they create a harmonious balance that will surely impress your guests. This dish is a fantastic way to highlight the natural flavors of Brussels sprouts while adding a touch of indulgence with the maple glaze.
Start by selecting the freshest and most vibrant Brussels sprouts you can find. Their rich green color and compact form are indicators of freshness. With just a few simple ingredients, you can create a dish that’s both nutritious and delicious, making it a perfect addition to any meal.
Ingredients:
- 1.5 pounds Brussels sprouts
- 2 tablespoons olive oil
- 1 teaspoon salt
- 1/2 teaspoon black pepper
- 1/4 cup pure maple syrup
- 1 tablespoon balsamic vinegar
- Pinch of red pepper flakes
Cooking Instructions:
- Preheat your oven to 400°F (200°C).
- Trim the ends of the Brussels sprouts and remove any yellowing outer leaves. Halve the sprouts for faster roasting.
- In a large bowl, toss the halved Brussels sprouts with olive oil, salt, and pepper.
- Spread the Brussels sprouts in a single layer on a baking sheet, ensuring they aren’t overcrowded.
- Roast the Brussels sprouts in the preheated oven for about 20 minutes, stirring halfway through for even cooking.
- While the sprouts are roasting, prepare the glaze by combining maple syrup, balsamic vinegar, and red pepper flakes in a small saucepan.
- Simmer the glaze mixture over low heat until slightly thickened, stirring occasionally.
- Once the Brussels sprouts are golden and slightly crispy, remove them from the oven.
- Drizzle the maple glaze over the roasted Brussels sprouts and toss gently to ensure they’re evenly coated.
- Serve warm.
Extra Tips:
For the best results, avoid overcrowding the baking sheet, as this can lead to steaming instead of roasting, which affects the texture.
If you prefer a more pronounced heat, you can adjust the amount of red pepper flakes in the glaze to suit your taste. Additionally, ensure the glaze isn’t too thick before drizzling, as it will continue to thicken as it cools.
Enjoy these maple glazed Brussels sprouts as a standout side dish or as a delightful addition to your appetizer selection.
Jalapeño Poppers

Looking to add a bit of spice to your Thanksgiving table? Jalapeño poppers are the perfect appetizer to do just that. These delightful bite-sized snacks bring together heat, creaminess, and crunch, making them a favorite among guests.
When you serve these poppers at your holiday feast, you not only add a flavorful twist to the spread but also offer a dish that’s sure to be the talk of the evening.
The key to perfect jalapeño poppers lies in the balance of flavors and textures. Fresh jalapeños provide the ideal vessel for the creamy filling, while the bacon wrapping adds a savory crunch.
Whether you prefer a milder popper or one that packs a punch, this recipe can be customized to fit your heat preference. Prepare to impress your guests with these irresistible treats!
Ingredients:
- 12 fresh jalapeños
- 8 oz cream cheese, softened
- 1 cup shredded cheddar cheese
- 1/2 teaspoon garlic powder
- 12 slices of bacon
- Toothpicks
Instructions:
- Preheat your oven to 375°F.
- Slice the jalapeños in half lengthwise and remove the seeds and membranes.
- In a bowl, mix together the cream cheese, shredded cheddar, and garlic powder until well combined.
- Spoon the cream cheese mixture into each jalapeño half, ensuring they’re packed tightly.
- Wrap each stuffed jalapeño with a slice of bacon and secure it with a toothpick.
- Place the wrapped jalapeños on a baking sheet lined with parchment paper.
- Bake in the preheated oven for 20-25 minutes until the bacon is crispy and the cheese is bubbling.
- Serve hot.
Extra Tips:
For a spicier popper, consider leaving some seeds in the jalapeños or adding a pinch of cayenne pepper to the cheese mixture.
If you prefer a different cheese, feel free to substitute the cheddar with pepper jack or mozzarella for a unique flavor.
Make sure the bacon is wrapped tightly around the jalapeños to ensure it crisps up nicely in the oven. Serve these poppers immediately for the best taste and texture, as they tend to lose their crunch if left sitting for too long.
Caprese Salad Skewers

Caprese salad skewers are an excellent way to add a refreshing and elegant touch to your Thanksgiving spread. They stand out with their vibrant colors and fresh flavors, offering a delightful contrast to the traditional dishes.
These skewers aren’t only easy to assemble but also visually appealing, making them a popular choice among guests. Perfect for busy Thanksgiving preparations, Caprese salad skewers can be made ahead of time and stored in the refrigerator.
With just a few simple ingredients, they provide a burst of flavor from the combination of juicy tomatoes, creamy mozzarella, and fresh basil. Drizzled with olive oil and balsamic glaze, they deliver a harmonious balance of sweetness and acidity.
Ingredients:
- 1 pint cherry tomatoes
- 1 bunch fresh basil leaves
- 8 ounces fresh mozzarella balls
- 2 tablespoons olive oil
- 2 tablespoons balsamic glaze
- Salt, to taste
- Pepper, to taste
- Skewers
Instructions:
- Gather all ingredients and skewers.
- Slide a cherry tomato onto the skewer.
- Add a fresh basil leaf.
- Follow with a mozzarella ball.
- Repeat the sequence until the skewer is filled.
- Drizzle olive oil over the skewers.
- Drizzle balsamic glaze on top.
- Sprinkle with salt and pepper to taste.
- Store the skewers in the refrigerator until ready to serve.
When making Caprese salad skewers, opt for fresh mozzarella to achieve a creamier texture that pairs beautifully with the tomatoes.
If preparing in advance, keep the skewers refrigerated to maintain freshness. For an extra touch, consider adding a light dusting of Italian seasoning or a few drops of lemon juice to enhance the flavors further.
Butternut Squash Soup Shots

For a cozy start to your Thanksgiving celebration, consider serving butternut squash soup shots. These small servings capture the essence of autumn with their rich, comforting flavors, making them an ideal addition to your appetizer spread. Their vibrant orange color not only enhances the visual appeal of your table but also ties in beautifully with the season’s theme.
Crafting these delightful soup shots involves simple steps that highlight the natural sweetness of butternut squash, complemented by aromatic spices. The result is a smooth, creamy texture that feels luxurious in every sip. Perfect for whetting your guests’ appetites without overwhelming them before the main course, these shots are both elegant and satisfying.
Ingredients:
- 1 medium butternut squash, peeled and cubed
- 1 tablespoon olive oil
- 1 large onion, chopped
- 2 cloves garlic, minced
- 4 cups vegetable or chicken broth
- 1 teaspoon salt
- 1/2 teaspoon black pepper
- 1/4 teaspoon nutmeg
- 1/2 cup cream or coconut milk
- Pumpkin seeds, toasted (for garnish)
- Sour cream (for garnish)
Instructions:
- Preheat the oven to 400°F (200°C).
- Toss the cubed butternut squash with olive oil and spread on a baking sheet.
- Roast in the oven for 25-30 minutes until tender.
- In a large pot, sauté the chopped onion and minced garlic over medium heat until translucent.
- Add the roasted squash to the pot.
- Pour in the vegetable or chicken broth to cover the squash mixture.
- Season with salt, pepper, and nutmeg.
- Simmer the mixture for about 15 minutes to blend the flavors.
- Use an immersion blender to puree the soup until smooth and creamy.
- Stir in the cream or coconut milk for a velvety texture.
- Serve the soup in shot glasses or small cups.
- Garnish each serving with toasted pumpkin seeds or a dollop of sour cream.
For the best results, choose a ripe butternut squash to ensure natural sweetness. When roasting, ensure the squash pieces are evenly cut to promote uniform cooking. If you prefer a thicker consistency, reduce the amount of broth slightly. Adjust seasoning to taste, keeping in mind that the nutmeg adds a subtle warmth that enhances the soup’s flavor profile.
Puff Pastry Sausage Rolls
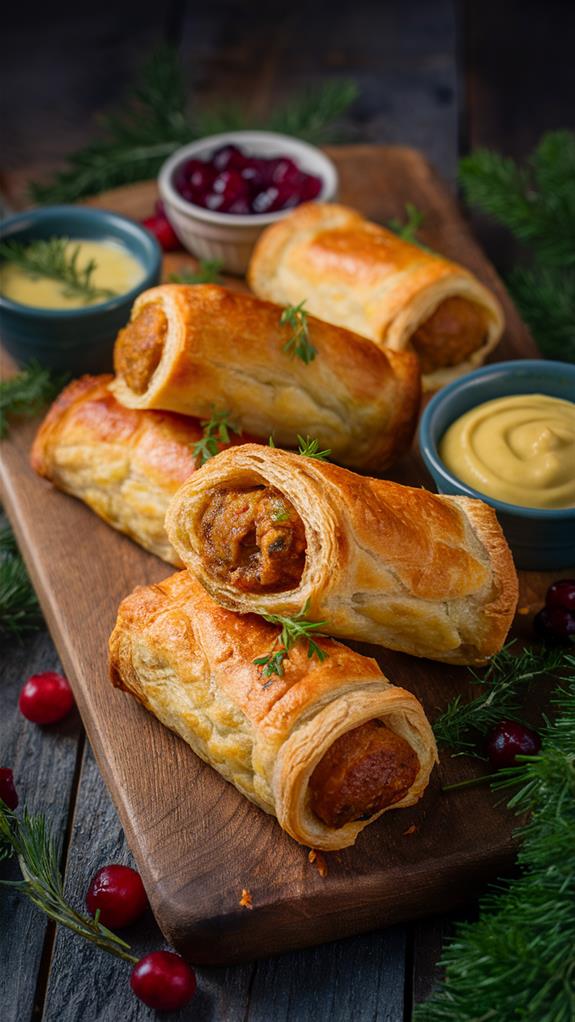
Puff pastry sausage rolls are a timeless favorite, offering a delightful combination of flaky pastry and savory sausage filling. They’re an excellent choice for any gathering, especially Thanksgiving, as they bring both flavor and elegance to the table. Perfectly crispy on the outside and juicy on the inside, these rolls are bound to be a hit with guests of all ages.
What makes puff pastry sausage rolls particularly appealing is their simplicity in preparation, despite their sophisticated appearance. By selecting a high-quality sausage with your preferred seasonings—be it pork, chicken, or turkey—you can easily tailor these appetizers to your taste. The harmony of flavors and textures is sure to make these rolls a standout addition to your holiday spread.
Ingredients:
- 1 package puff pastry sheets (approximately 17.3 oz/490g)
- 1 lb (450g) sausage meat (pork, chicken, or turkey)
- 1 egg, beaten
- Flour, for dusting
Instructions:
- Preheat your oven to 400°F (200°C).
- Lightly dust your work surface with flour and roll out the puff pastry sheets.
- Cut the pastry into even rectangles, approximately 3×4 inches each.
- Shape the sausage meat into small logs, placing each log along the edge of a pastry rectangle.
- Roll the pastry over the sausage, sealing the edges with a little beaten egg.
- Arrange the rolls seam-side down on a baking sheet lined with parchment paper.
- Brush the tops with more beaten egg to achieve a golden finish.
- Bake in the preheated oven for about 20-25 minutes, or until the pastry is puffed and golden brown.
- Allow the rolls to cool slightly before serving.
Extra Tips:
To ensure your puff pastry sausage rolls are as delicious as possible, make sure the pastry remains chilled before baking, as this will help it rise and become crispier.
Try experimenting with different spices and herbs in your sausage mixture for a personalized touch. Lastly, serve these rolls with a variety of dipping sauces, such as mustard or a tangy chutney, to enhance their flavors even further.
Fig and Goat Cheese Tartlets
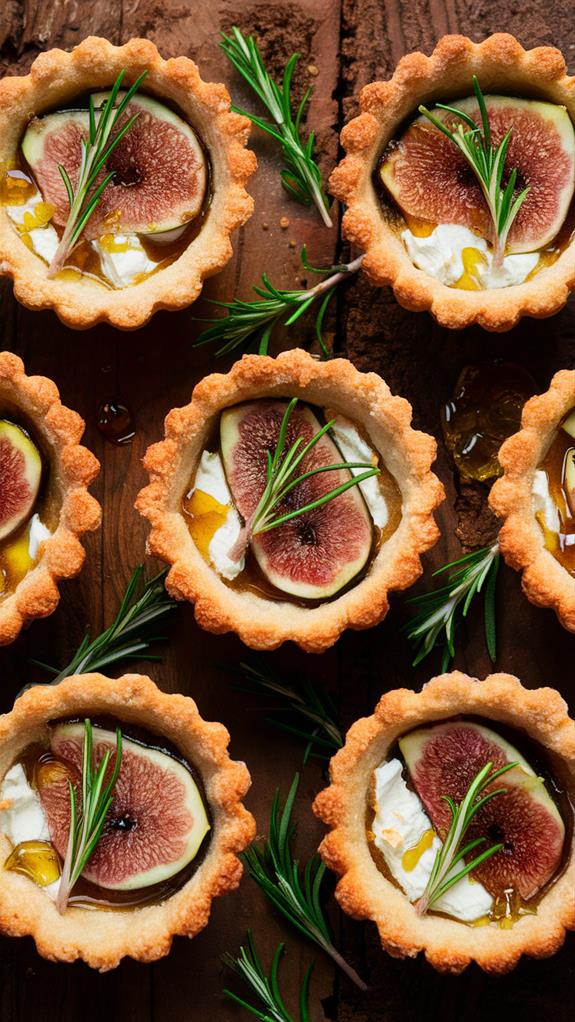
Fig and goat cheese tartlets are a delightful appetizer perfect for any gathering. The combination of sweet figs and creamy, tangy goat cheese creates a harmonious blend of flavors that’s sure to please your guests.
These tartlets aren’t only delicious but also visually appealing, making them a standout dish on any table. Whether you’re preparing for a holiday feast or a casual get-together, these tartlets are simple to make and require minimal ingredients.
You have the option to use store-bought tartlet shells or make your own if you want to add a personal touch. Either way, the result is a crispy base that complements the luscious filling beautifully.
Ingredients:
- Pre-made tartlet shells: 12 pieces
- Fresh figs: 6, chopped into small pieces
- Honey: 2 tablespoons
- Goat cheese: 4 ounces
- Salt: 1/4 teaspoon
- Black pepper: 1/4 teaspoon
Cooking Instructions:
- Preheat your oven to 375°F (190°C).
- Chop fresh figs into small, bite-sized pieces.
- In a bowl, combine chopped figs with 2 tablespoons of honey, 1/4 teaspoon of salt, and 1/4 teaspoon of black pepper.
- Soften 4 ounces of goat cheese in the microwave for about 10 seconds.
- Place a small amount of softened goat cheese into each tartlet shell.
- Add a dollop of the fig mixture on top of the goat cheese in each shell.
- Arrange the filled tartlets on a baking sheet.
- Bake in the preheated oven for 10-12 minutes until the cheese is bubbly and the figs are slightly caramelized.
- Remove from the oven and let cool slightly before serving.
For extra tips, ensure that the goat cheese isn’t overly melted; just a light softening will make it easier to spoon into the tartlet shells.
If you prefer a slightly more savory flavor, consider adding a sprinkle of fresh herbs like thyme or rosemary before baking. These tartlets are best served warm, so try to time their preparation close to when you plan to serve them.
Enjoy the delightful contrast of textures and flavors in every bite!
Herb-Infused Olives
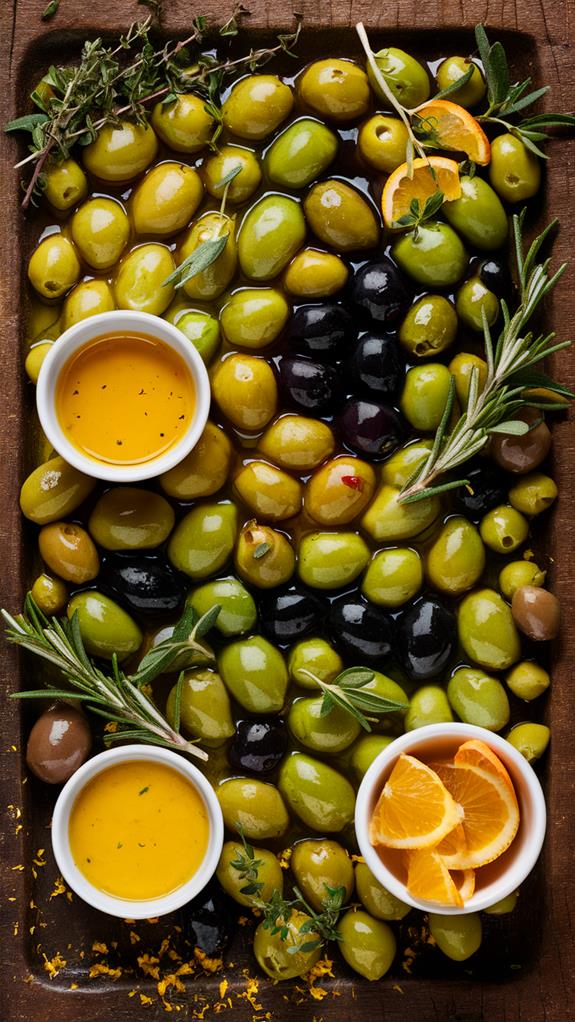
Herb-infused olives are a delightful and elegant addition to any Thanksgiving spread. They provide a burst of Mediterranean flavor that pairs perfectly with a glass of wine, making them an excellent appetizer for guests to enjoy as they mingle and catch up. The combination of olives with aromatic herbs and spices creates a rich and complex taste that’s both refreshing and satisfying.
This dish isn’t only simple to prepare but also allows for flexibility in terms of flavor combinations. By using a variety of olives and fresh herbs, you can tailor the mix to suit your personal taste preferences. Whether you prefer the robust flavor of Kalamata olives or the buttery texture of Castelvetrano, herb-infused olives are sure to become a staple in your holiday menu.
Ingredients:
- 1 cup Kalamata olives
- 1 cup Castelvetrano olives
- 1 cup green olives
- 1/4 cup extra virgin olive oil
- 3 garlic cloves, smashed
- Strips of zest from 1 lemon
- 1 tablespoon fresh rosemary leaves
- 1 tablespoon fresh thyme leaves
- 1 tablespoon fresh oregano leaves
- 1/2 teaspoon red pepper flakes
Instructions:
- Rinse and drain the olives to remove any excess brine.
- In a large bowl, combine the olives with extra virgin olive oil.
- Add the smashed garlic cloves, lemon zest strips, rosemary, thyme, oregano, and red pepper flakes to the bowl.
- Toss all the ingredients together until the olives are evenly coated with the mixture.
- Allow the olives to marinate at room temperature for at least one hour.
- For a deeper infusion of flavors, prepare the olives a day in advance and let them marinate overnight in the refrigerator.
- Before serving, bring the olives to room temperature and serve them in a shallow dish, garnished with fresh herb sprigs.
Extra Tips:
For the best results, use high-quality, fresh ingredients. Fresh herbs will impart a more vibrant flavor compared to dried ones. If you prefer a milder taste, adjust the amount of garlic and red pepper flakes.
Remember that the longer the olives marinate, the more intense the flavors will become, so prepare them according to your preferred taste intensity.
Caramelized Onion Tartlets
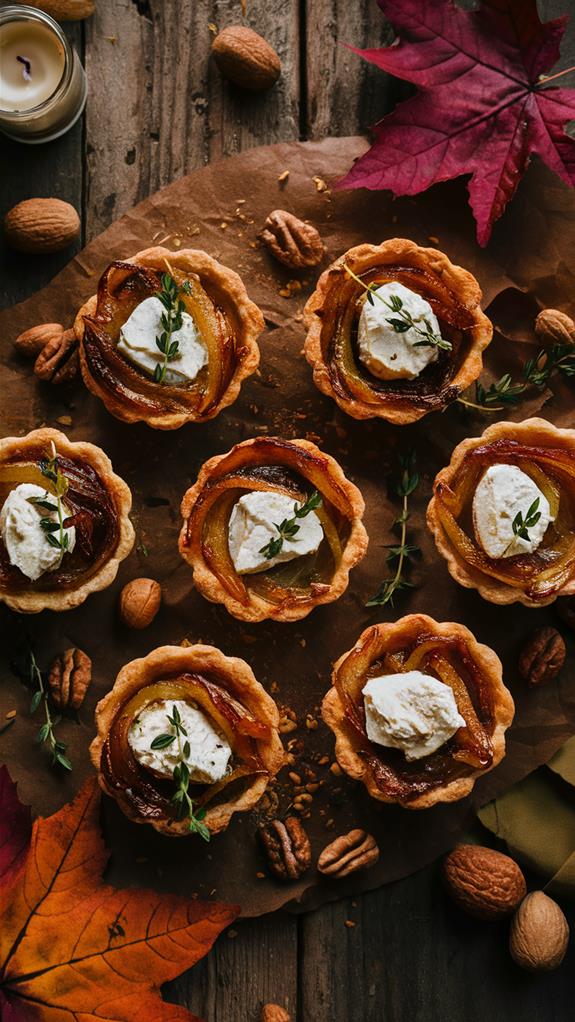
Caramelized onion tartlets are a delectable addition to any Thanksgiving appetizer spread. These petite pastries combine the luscious sweetness of caramelized onions with the buttery crispness of a flaky pastry crust. The harmonious blend of flavors and textures makes these tartlets a crowd-pleaser that will leave your guests craving more.
Not only are these tartlets delicious, but they’re also surprisingly easy to make, freeing you to focus on other holiday meal preparations. With a few simple ingredients and some patience, you can create an appetizer that exudes gourmet flair and culinary sophistication.
Ingredients:
- 2 large onions, thinly sliced
- 2 tablespoons unsalted butter
- 1 tablespoon balsamic vinegar
- 1 package puff pastry sheets
- 4 ounces goat cheese or crème fraîche
- Salt, to taste
- Pepper, to taste
Cooking Instructions:
- Preheat your oven to 400°F (200°C).
- In a large skillet, melt the butter over low heat.
- Add the sliced onions to the skillet and cook slowly, stirring occasionally, until they’re golden and caramelized (about 30-40 minutes).
- Stir in the balsamic vinegar, salt, and pepper, and cook for an additional 2 minutes.
- Roll out the puff pastry sheets on a lightly floured surface and cut them into small circles or squares.
- Place the pastry pieces on a baking sheet lined with parchment paper.
- Spoon a portion of the caramelized onions onto each pastry piece.
- Top each with a sprinkle of goat cheese or a dollop of crème fraîche.
- Bake in the preheated oven for 15-20 minutes, or until the pastry is golden and puffed.
- Remove from the oven and let cool slightly before serving.
Extra Tips: When caramelizing the onions, be sure to cook them slowly and stir frequently to prevent burning. For a flavor variation, consider adding a pinch of thyme or rosemary to the onions. If using frozen puff pastry, let it thaw in the refrigerator before use.
Serve the tartlets warm for the best flavor experience, and watch them disappear in no time!
