24 Simple Christmas Dessert Ideas
When the holiday season rolls around, you might find yourself searching for dessert options that balance simplicity and flavor. Have you considered how a classic sugar cookie or a rich peppermint bark could elevate your Christmas spread without requiring hours in the kitchen?
From the comforting nostalgia of a Yule log cake to the effortless charm of marshmallow pops, each dessert idea has its unique charm. But what if there’s more to these treats than meets the eye? Stick around to discover how each can transform your festive gatherings into memorable culinary experiences.
Classic Sugar Cookies

When it comes to holiday baking, nothing embodies the warmth and spirit of Christmas quite like classic sugar cookies. These delightful treats aren’t only delicious but also incredibly versatile, allowing you and your loved ones to enjoy both the baking and decorating processes.
Gathering in the kitchen to bake these cookies can be a cherished tradition, bringing families and friends together. The aroma of freshly baked sugar cookies fills the home, evoking memories of holidays past and creating new ones for the future.
Plus, the opportunity to decorate each cookie according to personal taste adds a layer of creativity and fun to the experience. So, let’s dive into the process of making these classic sugar cookies, ensuring that each one is crafted with love and shared with those you hold dear.
Ingredients:
- 2 3/4 cups all-purpose flour
- 1 cup granulated sugar
- 1 cup unsalted butter, softened
- 2 large eggs
- 1 teaspoon vanilla extract
- 1 teaspoon baking powder
Cooking Instructions:
- In a large mixing bowl, combine the flour and baking powder. Set aside.
- In another bowl, cream together the softened butter and sugar until light and fluffy.
- Add the eggs and vanilla extract to the creamed mixture, mixing until well combined.
- Gradually add the dry ingredients to the wet ingredients, mixing until a smooth dough forms.
- Wrap the dough in plastic wrap and chill it in the refrigerator for at least one hour.
- Preheat your oven to 350°F (175°C).
- Roll out the chilled dough on a floured surface to about 1/4-inch thickness.
- Use festive cookie cutters to create desired shapes and place them on a baking sheet lined with parchment paper.
- Bake in the preheated oven for approximately 10 minutes, or until the edges are just golden.
- Remove from the oven and let the cookies cool completely on a wire rack.
Extra Tips:
For the best results, ensure your butter is at room temperature before creaming it with the sugar, as this will create a lighter texture for your cookies.
Chilling the dough is crucial to prevent the cookies from spreading too much during baking and losing their shape.
When decorating, using piping bags can offer more control over the icing application, allowing for intricate designs.
If you’re planning to gift these, consider wrapping them in decorative tins or boxes for an added touch of festivity. Enjoy the process, and remember that each cookie is a little piece of holiday magic to be shared with those you love.
Peppermint Bark
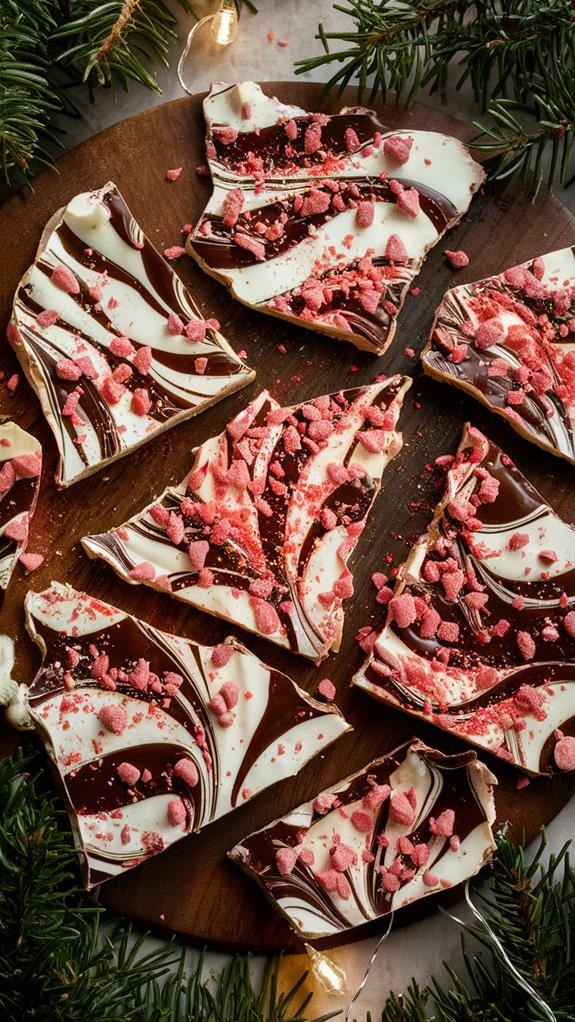
Peppermint bark is a classic holiday indulgence that captures the essence of festive cheer with its vibrant flavors and contrasting textures. This delightful treat combines the deep, rich notes of chocolate with the invigorating crunch of peppermint, making it a favorite during the winter season.
The allure of peppermint bark lies in its simplicity and elegance. It’s a versatile confection that can be enjoyed as a personal treat or beautifully wrapped as a thoughtful gift. The interplay between the smooth layers of chocolate and the crunchy peppermint pieces creates a sensory delight that captures the spirit of the holidays.
To begin your peppermint bark journey, gather the following ingredients:
- 8 ounces dark or semi-sweet chocolate
- 8 ounces white chocolate
- 1 cup peppermint candies or candy canes
Instructions:
- Melt the dark chocolate in a heatproof bowl over simmering water or in the microwave in short, controlled bursts until smooth.
- Spread the melted dark chocolate evenly on a parchment-lined baking sheet.
- Place the baking sheet in the refrigerator and allow the chocolate to set.
- Meanwhile, melt the white chocolate using the same method as the dark chocolate.
- Pour the melted white chocolate over the solidified dark chocolate layer and smooth it out with a spatula.
- Crush the peppermint candies into small pieces.
- Sprinkle the crushed peppermint evenly over the white chocolate layer before it begins to harden, pressing them gently to ensure they adhere.
- Return the tray to the refrigerator until the bark is firm.
- Once set, break the peppermint bark into pieces using your hands or a sharp knife.
Extra Tips:
For a smoother texture, ensure that the chocolate is completely melted and well-tempered before spreading it on the baking sheet.
When crushing the peppermint, aim for a variety of sizes to add visual interest and texture to your bark. Additionally, consider experimenting with different types of chocolate or adding a touch of sea salt to enhance the flavor profile.
Store the peppermint bark in an airtight container to maintain its freshness and enjoy throughout the holiday season.
Yule Log Cake
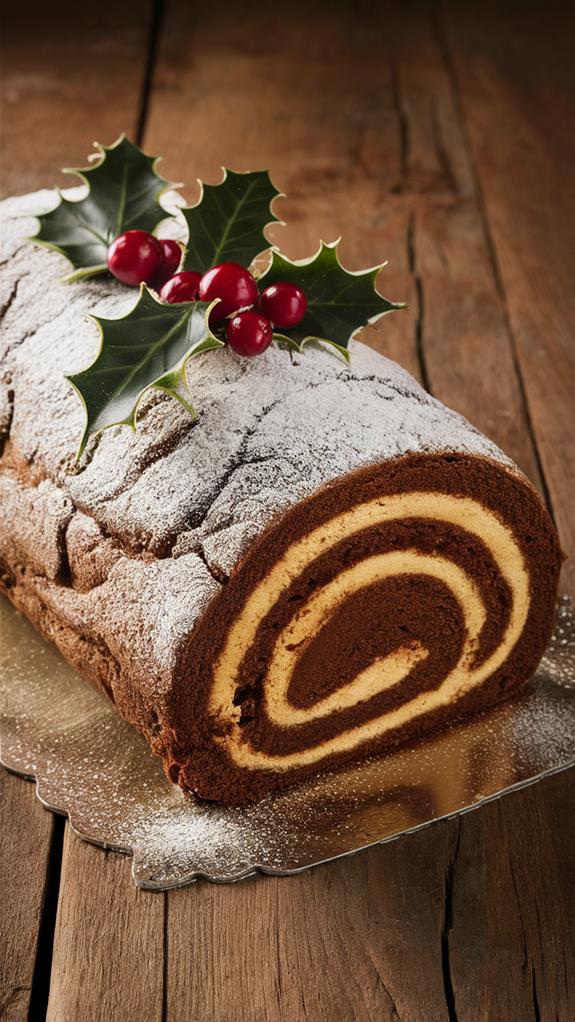
The Yule Log Cake, also known as Bûche de Noël, is a traditional dessert that adds warmth and nostalgia to any holiday gathering. Originating from European Christmas customs, this cake embodies the spirit of the festive season by replicating the cozy ambiance of a burning Yule log. Its visual appeal is matched only by its delightful taste, making it the perfect centerpiece for your holiday table.
Creating a Yule Log Cake involves crafting a delicate balance of flavors and textures. The process begins with a light and airy sponge cake that, when paired with a luscious filling such as chocolate ganache or buttercream, offers an irresistible swirl of sweetness.
Once rolled, the cake is enveloped in a rich chocolate frosting and artistically textured to resemble a real log. The finishing touches, like a dusting of powdered sugar and decorative elements like meringue mushrooms or sugared cranberries, enhance its festive allure.
Ingredients:
- 1 cup all-purpose flour
- 1/4 cup unsweetened cocoa powder
- 1 teaspoon baking powder
- 1/4 teaspoon salt
- 4 large eggs
- 3/4 cup granulated sugar
- 1 teaspoon vanilla extract
- 1/4 cup confectioners’ sugar (for dusting)
- 1 cup heavy cream
- 8 oz semi-sweet chocolate, chopped
- 1/2 cup unsalted butter, softened
- 2 cups confectioners’ sugar
- 2 tablespoons milk
- 1 teaspoon vanilla extract
Instructions:
- Preheat your oven to 350°F (175°C) and line a 15×10-inch jelly roll pan with parchment paper.
- In a bowl, sift together the flour, cocoa powder, baking powder, and salt.
- In a separate bowl, beat the eggs and granulated sugar until thick and pale. Stir in the vanilla extract.
- Gradually fold the dry ingredients into the egg mixture until just combined.
- Pour the batter into the prepared pan, spreading it evenly.
- Bake for 10-12 minutes or until the cake springs back when touched.
- While the cake is baking, prepare a cloth dusted with confectioners’ sugar.
- Once baked, invert the cake onto the cloth and gently peel off the parchment paper.
- Roll the cake up with the cloth from the short end and let it cool completely.
- For the filling, heat the heavy cream until just simmering, then pour over the chopped chocolate. Let it sit for a minute, then stir until smooth.
- Unroll the cooled cake and spread the chocolate ganache evenly, then re-roll the cake.
- For the frosting, beat the butter until creamy, then gradually add confectioners’ sugar, milk, and vanilla extract. Beat until smooth.
- Cover the rolled cake with the frosting, using a fork to create bark-like textures.
- Decorate with a dusting of confectioners’ sugar and chosen festive decorations.
Extra Tips: When making the sponge cake, be careful not to over-mix the batter as this can deflate the eggs and result in a dense cake.
Allow the cake to cool properly before unrolling and filling to avoid cracks. Personalize your Yule Log with creative decorations for a unique holiday touch that impresses your guests.
Gingerbread Men
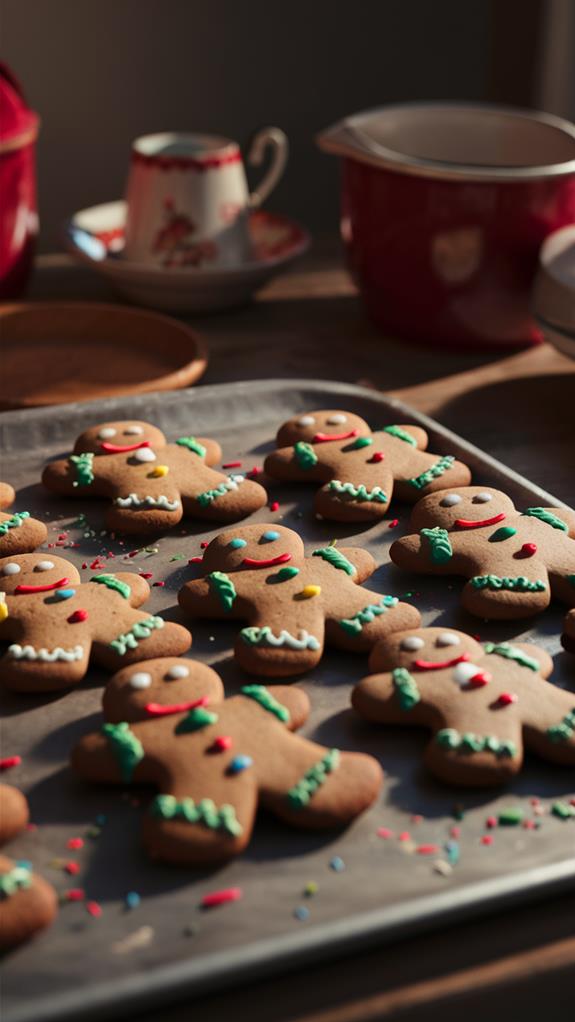
Gingerbread Men cookies are a delightful treat that goes beyond their charming appearance to offer a taste of holiday magic. The combination of ginger, cinnamon, and cloves in these cookies conjures up the essence of Christmas, bringing warmth and coziness with every bite.
Baking Gingerbread Men at home is a joyful activity that fills your kitchen with an inviting aroma, instantly setting a festive mood. This classic culinary endeavor is perfect for creating cherished family memories, especially when you involve children in the decorating process.
Ingredients:
- 3 1/4 cups all-purpose flour
- 3/4 cup packed brown sugar
- 3/4 teaspoon baking soda
- 1 tablespoon ground ginger
- 1 tablespoon ground cinnamon
- 1/2 teaspoon ground cloves
- 1/2 teaspoon salt
- 12 tablespoons (1 1/2 sticks) unsalted butter, room temperature
- 3/4 cup molasses
- 1 large egg
- Raisins, icing, or candies for decoration
Instructions:
- In a large bowl, whisk together the flour, brown sugar, baking soda, ginger, cinnamon, cloves, and salt.
- Add the butter to the dry ingredients and mix until the mixture resembles coarse crumbs.
- Stir in the molasses and egg, mixing until the dough is evenly combined.
- Divide the dough in half, flatten into disks, wrap in plastic, and refrigerate for at least 1 hour or until firm.
- Preheat the oven to 350°F (175°C) and line baking sheets with parchment paper.
- Roll out the dough on a lightly floured surface to a thickness of about 1/4 inch.
- Use cookie cutters to cut out Gingerbread Men shapes, then transfer to the prepared baking sheets.
- Decorate the cookies with raisins, icing, or candies as desired.
- Bake for 8 to 10 minutes, or until the edges are firm.
- Allow the cookies to cool on the baking sheets for a few minutes before transferring to wire racks to cool completely.
Extra Tips:
For extra flavor, consider incorporating a pinch of nutmeg into the dough. If the dough becomes too sticky while rolling, lightly flour your rolling pin and surface to prevent sticking.
To ensure even baking, rotate your baking sheets halfway through the baking time. Store the cookies in an airtight container to maintain their crunch and spiciness. Enjoy the creative process and have fun personalizing each Gingerbread Man with unique decorations!
Eggnog Pudding
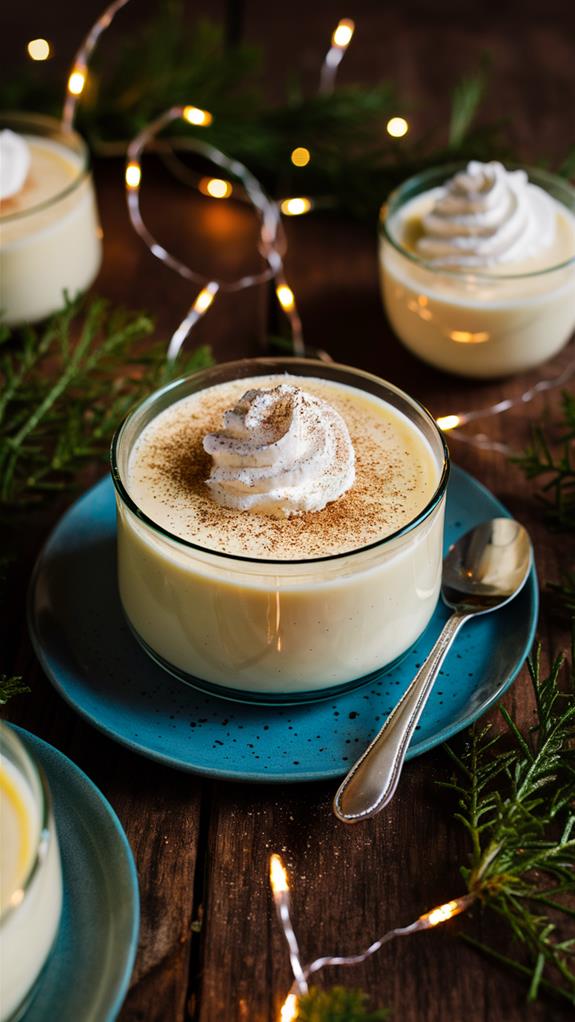
As the holiday season unfolds, there’s nothing quite like the comforting taste of a classic dessert to bring warmth and joy to your gatherings. Eggnog Pudding is a delightful treat that captures the nostalgic flavors of the season, transforming the beloved holiday beverage into a smooth and velvety dessert.
With its creamy texture and rich notes of nutmeg and cinnamon, this pudding is sure to become a favorite at any festive occasion. Perfect for a cozy family gathering or an elegant holiday dinner, Eggnog Pudding is both simple to prepare and impressive to serve.
Ingredients:
- 2 cups eggnog
- 1/4 cup granulated sugar
- 1/2 teaspoon ground nutmeg
- 3 tablespoons cornstarch
- 1/4 teaspoon ground cinnamon (for topping)
- Whipped cream (optional, for topping)
Instructions:
- In a medium saucepan, whisk together the eggnog, sugar, and ground nutmeg.
- Place the saucepan over medium heat, allowing the mixture to warm. Stir occasionally.
- In a separate small bowl, mix the cornstarch with a small amount of eggnog to create a smooth paste.
- Gradually add the cornstarch paste to the warm eggnog mixture, stirring constantly to avoid lumps.
- Continue to stir the mixture over medium heat until it thickens to a pudding-like consistency.
- Remove the saucepan from the heat.
- Pour the pudding into individual serving dishes or a festive bowl.
- Allow the pudding to cool to room temperature, then refrigerate for at least two hours.
- Before serving, sprinkle a dash of ground cinnamon or add a dollop of whipped cream on top.
Extra Tips:
For an even richer flavor, consider using homemade eggnog for this recipe. If you prefer a thicker pudding, increase the amount of cornstarch slightly.
Be sure to stir continuously while heating to ensure a smooth consistency and prevent the pudding from sticking to the bottom of the saucepan. To add a festive touch, you can also garnish with nutmeg or cinnamon sticks.
Enjoy your Eggnog Pudding as part of your holiday festivities, creating cherished memories with every spoonful.
Chocolate Truffles
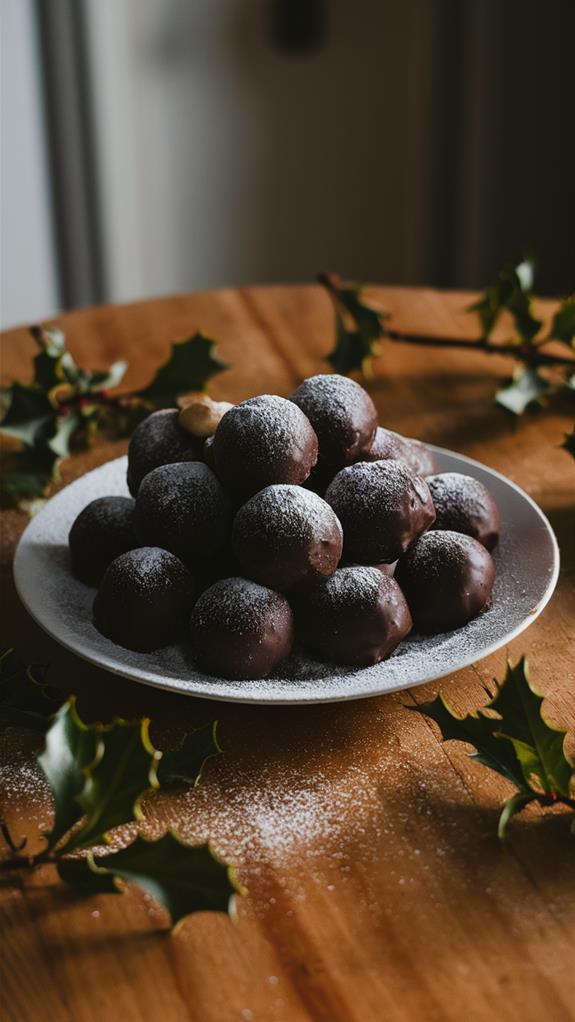
Indulge in the decadence of homemade Chocolate Truffles this holiday season, a treat that’s both luxurious and surprisingly easy to make. Perfect for impressing guests or gifting to loved ones, these truffles offer a rich, velvety experience that’s sure to delight.
The secret to these truffles lies in the quality of the chocolate and the smoothness of the ganache. By using high-quality chocolate and carefully combining it with heavy cream, you can achieve a luscious texture that’s truly indulgent.
Ingredients:
- 8 ounces high-quality dark chocolate
- 1/2 cup heavy cream
- Cocoa powder, for coating
- Finely chopped nuts, for coating
- Shredded coconut, for coating
Cooking Instructions:
- Melt the dark chocolate in a double boiler over simmering water, stirring until smooth.
- Remove from heat and gradually stir in the heavy cream until fully incorporated, forming a smooth ganache.
- Transfer the ganache to a shallow dish and refrigerate until firm, about 1-2 hours.
- Once set, use a melon baller or small spoon to scoop out portions of the ganache.
- Quickly roll each portion in your hands to form small spheres.
- Roll each truffle in your choice of coatings such as cocoa powder, chopped nuts, or shredded coconut.
- Place the coated truffles on a baking sheet lined with parchment paper and refrigerate until ready to serve.
Extra Tips:
For the best results, ensure your chocolate is finely chopped before melting to aid in even melting.
Work quickly when shaping the truffles as the heat from your hands can soften them. If the ganache becomes too soft, simply return it to the refrigerator to firm up again before continuing.
Experiment with different coatings to find your favorite combinations, and consider adding extracts or spices to the ganache for a unique twist.
Rum Balls
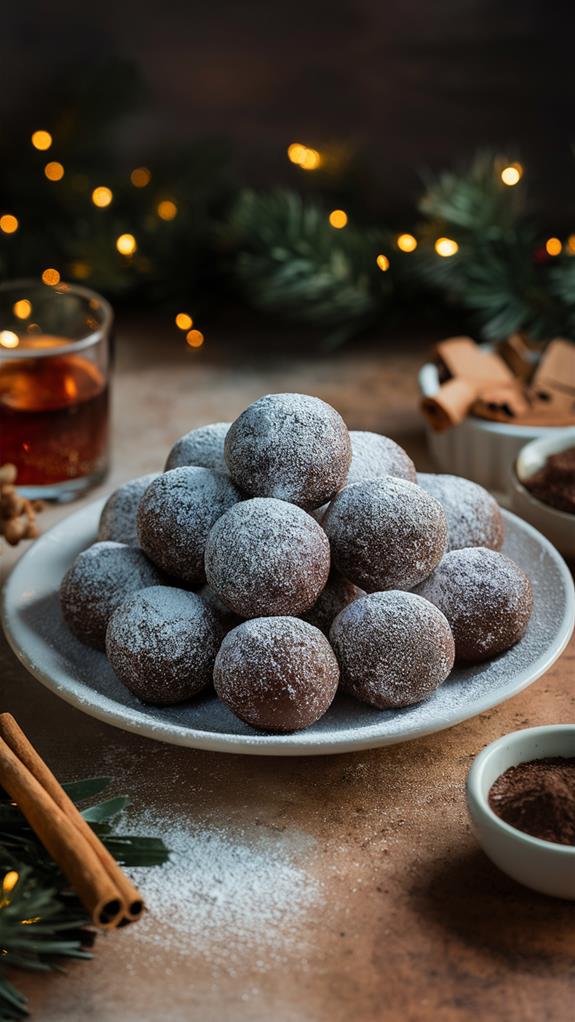
For a festive indulgence that’s both simple to prepare and irresistibly delicious, consider making Rum Balls this holiday season. These no-bake treats are perfect for adding a touch of sophistication and a hint of warmth to your dessert table. Not only are they visually appealing, but their rich flavor is sure to captivate your taste buds and those of your guests.
Rum Balls are an ideal choice for those who find themselves pressed for time during the busy holiday season. With minimal ingredients and no need for an oven, these delightful confections can be whipped up in no time.
Ingredients:
- 2 cups crushed vanilla wafers
- 1/2 cup cocoa powder
- 1 cup powdered sugar
- 1/4 cup corn syrup
- 1/2 cup rum
- 1/2 cup chopped nuts (optional)
- Additional powdered sugar or cocoa powder for coating
Instructions:
- In a large bowl, mix the crushed vanilla wafers, cocoa powder, and powdered sugar.
- Stir in the corn syrup and rum until the mixture is well combined.
- If using chopped nuts, fold them into the mixture now.
- Ensure the mixture is moist enough to hold together when formed into balls.
- Roll the mixture into bite-sized balls.
- Coat each ball with additional powdered sugar or cocoa powder.
- Place the coated balls on a tray lined with parchment paper.
- Chill the tray in the refrigerator for a couple of hours until the balls are firm.
Extra Tips:
For the best flavor, prepare Rum Balls a day ahead to allow the flavors to fully develop and meld together.
If you find the mixture too sticky to handle, lightly moisten your hands with water while forming the balls.
Additionally, you can experiment with different types of rum or add a splash of flavor extract, such as vanilla or almond, for a unique twist on this classic treat.
Enjoy these delightful confections as a homemade gift or a sweet addition to your holiday gatherings.
Candy Cane Fudge

Candy Cane Fudge is the epitome of holiday cheer, combining the rich, creamy texture of traditional fudge with the crisp, refreshing crunch of peppermint. This delightful treat is perfect for those who crave a sweet yet minty surprise during the festive season.
Not only is it a joy to eat, but it’s also simple to make, providing an excellent opportunity to involve the entire family in holiday preparations. Crafting this fudge involves a few straightforward steps, and the result is a decadent dessert that will surely become a holiday favorite.
Ingredients:
- 2 cups white chocolate chips
- 1 can (14 ounces) sweetened condensed milk
- 1 teaspoon peppermint extract
- 1 cup crushed candy canes
Cooking Instructions:
- Combine the white chocolate chips and sweetened condensed milk in a saucepan.
- Melt the mixture over low heat, stirring continuously until smooth.
- Remove from heat and stir in the peppermint extract.
- Line a baking dish with parchment paper.
- Pour the melted mixture into the lined dish, spreading it evenly.
- Sprinkle the crushed candy canes generously over the top.
- Gently press the candy canes into the fudge.
- Refrigerate until the fudge is completely set.
- Once firm, cut into squares and serve.
Extra Tips:
For the best results, ensure the white chocolate chips melt completely with the condensed milk to create a smooth base.
Stirring constantly prevents the mixture from burning or sticking. When pressing the candy canes into the fudge, be gentle to maintain their shape and distribution.
Allow ample time for the fudge to set in the refrigerator, ensuring it achieves the perfect consistency for slicing.
Snowball Cookies
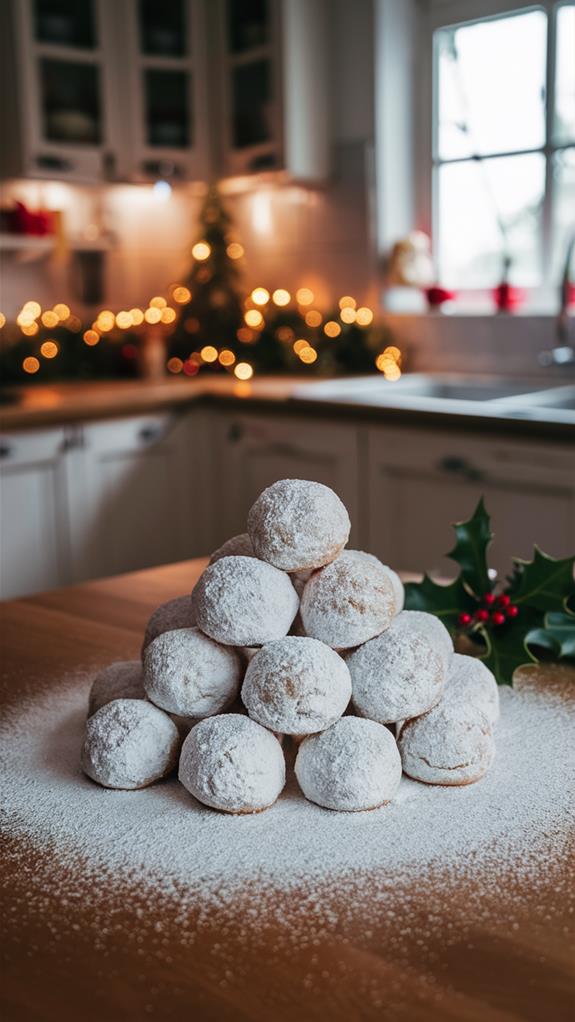
Amidst the flurry of holiday baking, few treats capture the magic of a white Christmas quite like Snowball Cookies. With their delicate, melt-in-your-mouth texture and subtle sweetness, these classic cookies bring a festive charm to any dessert table.
Snowball Cookies offer a simple yet satisfying option for your festive gatherings. They’re not only delicious but also easy to prepare. Their signature snowy appearance and timeless appeal make them a nostalgic favorite, sure to bring warmth and joy to your Christmas celebrations.
Ingredients:
- 1 cup (2 sticks) unsalted butter, softened
- 1/2 cup powdered sugar
- 1 teaspoon vanilla extract
- 2 1/4 cups all-purpose flour
- 1 cup finely chopped nuts (pecans or walnuts recommended)
- Additional powdered sugar for rolling
Instructions:
- Preheat your oven to 350°F (175°C).
- In a large mixing bowl, cream together the softened butter and 1/2 cup of powdered sugar until the mixture is light and fluffy.
- Add the vanilla extract and mix until well combined.
- Gradually add the all-purpose flour, mixing until just incorporated.
- Stir in the finely chopped nuts until evenly distributed throughout the dough.
- Shape the dough into small balls, approximately 1 inch in diameter, and place them on a baking sheet lined with parchment paper.
- Bake in the preheated oven for 12-15 minutes, or until the cookies are lightly golden at the bottom. Make sure not to over-bake as they should remain soft inside.
- While the cookies are still warm, roll them in additional powdered sugar to create their snowy appearance.
- Allow the cookies to cool completely on a wire rack before serving or storing.
Extra Tips:
For the best results, ensure your butter is at room temperature before starting. This will make it easier to cream with the sugar, resulting in a smoother dough.
Feel free to experiment with different nuts or even add a pinch of cinnamon for a slight twist. Snowball Cookies store well in an airtight container, so consider making them ahead of time for your holiday gatherings.
Enjoy these cookies with a cup of hot cocoa or coffee for an extra cozy treat!
Cranberry Bliss Bars
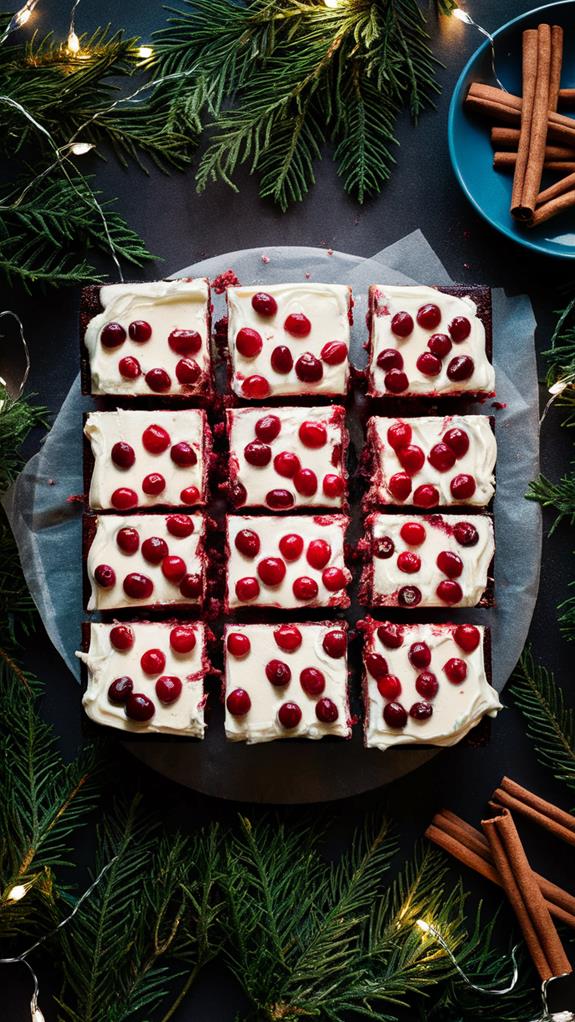
Cranberry Bliss Bars elevate the art of dessert-making with their exquisite blend of flavors. Perfect for holiday gatherings or a cozy night in, these bars offer a delightful fusion of tangy dried cranberries and the creamy allure of white chocolate. Their rich taste and elegant presentation make them an irresistible treat that captures the essence of the festive season.
The journey begins with a buttery blondie base, which serves as the perfect canvas for the harmonious mix of cranberries and white chocolate. Topped with a luscious cream cheese frosting, these bars are both visually stunning and full of flavor, ensuring they stand out in any dessert spread.
Ingredients:
- 1 cup all-purpose flour
- 3/4 cup granulated sugar
- 1/2 cup unsalted butter, softened
- 2 large eggs
- 1 teaspoon vanilla extract
- 1/2 cup dried cranberries
- 1/2 cup white chocolate chips
- 1/2 cup cream cheese frosting
- 2 tablespoons additional dried cranberries (for topping)
- 2 tablespoons melted white chocolate (for drizzle)
Cooking Instructions:
- Preheat your oven to 350°F (175°C). Grease a baking pan.
- In a bowl, mix the flour and sugar together.
- In another bowl, cream the butter until fluffy.
- Add eggs and vanilla to the creamed butter, mixing well.
- Gradually incorporate the dry ingredients into the wet mixture.
- Fold in cranberries and white chocolate chips until evenly distributed.
- Spread the mixture evenly in the prepared baking pan.
- Bake in the preheated oven for 20-25 minutes or until golden brown.
- Allow the bars to cool completely before frosting.
- Spread cream cheese frosting over the cooled bars.
- Sprinkle additional cranberries on top.
- Drizzle melted white chocolate over the bars for a finishing touch.
- Cut into squares and serve.
Extra Tips:
For the best results, ensure the butter is at room temperature before creaming it with sugar. This will create a smoother texture for your blondie base.
When folding in the cranberries and white chocolate chips, be gentle to maintain the airiness of the batter. If you prefer your bars with extra texture, consider toasting the white chocolate chips slightly before adding them.
Lastly, make sure the bars are completely cooled before applying the frosting to avoid it melting or becoming runny.
No-Bake Cheesecake
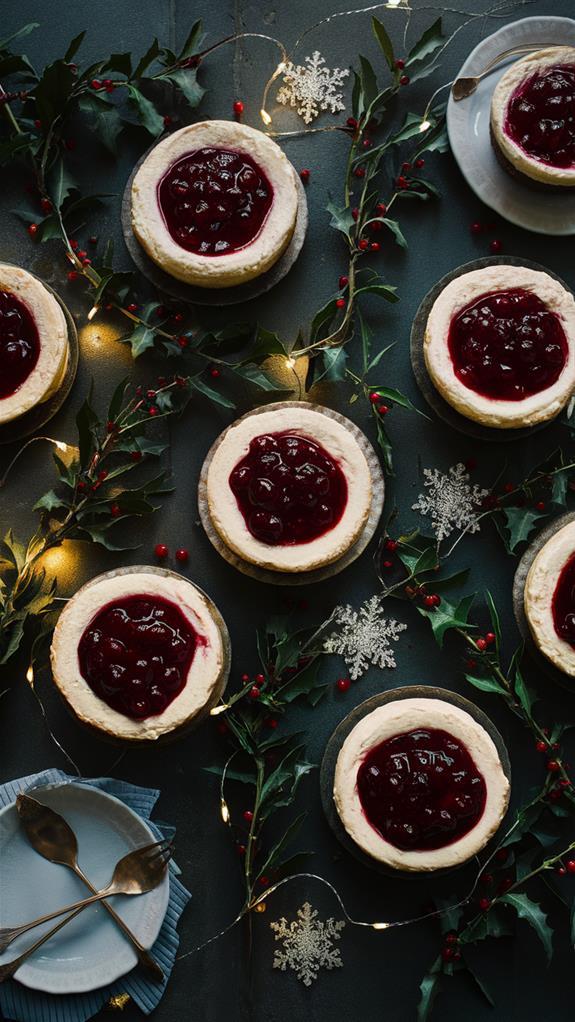
The holiday season is the perfect time to indulge in delicious desserts that are both easy to make and delightful to taste. After enjoying the rich and festive Cranberry Bliss Bars, you might find yourself yearning for something refreshing yet satisfying.
This no-bake cheesecake isn’t only simple to prepare but also versatile enough to fit into any Christmas dessert spread. With its rich, creamy filling and crumbly graham cracker crust, it promises to impress both your family and guests.
Ingredients:
- 1 ½ cups graham cracker crumbs
- ½ cup unsalted butter, melted
- 2 cups cream cheese, softened
- 1 cup granulated sugar
- 1 teaspoon vanilla extract
- 1 ½ cups whipped cream
Instructions:
- Crush the graham crackers into fine crumbs.
- Mix the crumbs with melted butter until well combined.
- Press the mixture firmly into the bottom of a springform pan to form the crust.
- Blend the cream cheese, sugar, and vanilla extract together until smooth.
- Gently fold in the whipped cream to add lightness to the filling.
- Spread the cream cheese mixture evenly over the graham cracker crust.
- Smooth the top with a spatula for an even surface.
- Refrigerate the cheesecake for at least four hours to allow it to set.
- Before serving, top with fresh berries or drizzle with fruit sauce for a festive touch.
Extra Tips:
When preparing this no-bake cheesecake, make sure the cream cheese is fully softened to ensure a smooth and creamy texture.
If you prefer a firmer crust, you can bake it for 10 minutes at 350°F before adding the filling, but be sure to let it cool completely.
Additionally, feel free to experiment with different toppings like chocolate shavings or caramel sauce to customize the cheesecake to your liking.
Enjoy the ease and deliciousness of this holiday favorite!
Chocolate Covered Pretzels

With the holiday season just around the corner, there’s no better time to indulge in the delightful combination of sweet and salty flavors that chocolate-covered pretzels provide. This simple, yet irresistible treat offers a perfect balance that satisfies cravings and brings joy to any festive gathering.
The versatility of this treat means you can choose from milk, dark, or white chocolate, each adding its unique flair to the pretzels. The process is straightforward and engaging, making it an ideal holiday activity to share with loved ones.
Ingredients:
- 2 cups of pretzels
- 1 cup of chocolate chips (milk, dark, or white)
- Optional toppings: crushed candy canes, colorful sprinkles, sea salt
Cooking Instructions:
- Place 1 cup of your chosen chocolate chips in a microwave-safe bowl.
- Microwave the chocolate in 30-second intervals, stirring after each, until smooth and fully melted.
- Dip each pretzel into the melted chocolate, ensuring it’s well-coated.
- Use a fork to lift the pretzel out, tapping gently to remove any excess chocolate.
- Place the coated pretzels on a baking sheet lined with parchment paper.
- Sprinkle your choice of optional toppings onto the pretzels before the chocolate sets.
- Allow the pretzels to cool at room temperature or refrigerate until the chocolate hardens.
Once the chocolate has set, your chocolate-covered pretzels are ready to be enjoyed or packaged as delightful homemade gifts.
For a smoother dipping experience, consider using a deep, narrow bowl to melt your chocolate, which helps achieve an even coat. Additionally, ensure that the pretzels are dry before dipping, as moisture can cause the chocolate to seize.
Enjoy the process and have fun experimenting with different toppings to add a personal touch to your holiday treats!
Coconut Macaroons
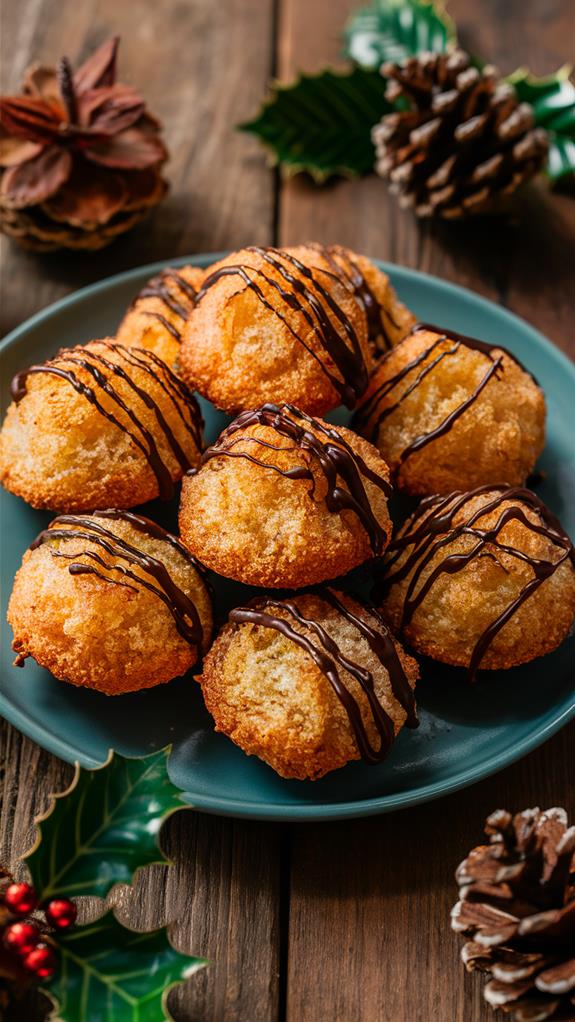
Coconut macaroons, a classic confection, bring a touch of tropical charm to any holiday dessert table. These treats are beloved for their chewy texture and the rich, sweet flavor of coconut, making them a must-try for anyone who adores this tropical fruit.
In essence, coconut macaroons are a celebration of coconut’s natural sweetness, enhanced by the smoothness of sweetened condensed milk and a hint of vanilla. This trio forms the foundational flavor profile that makes macaroons so irresistible.
Ingredients:
- 14 oz (400 g) shredded coconut
- 14 oz (400 ml) sweetened condensed milk
- 1 teaspoon vanilla extract
Cooking Instructions:
- Preheat your oven to 325°F (165°C).
- Line a baking sheet with parchment paper.
- In a large mixing bowl, combine the shredded coconut, sweetened condensed milk, and vanilla extract.
- Stir the mixture until it becomes sticky and well combined.
- Use a tablespoon to scoop out portions of the mixture and shape them into small mounds on the prepared baking sheet.
- Space the mounds slightly apart to ensure even baking.
- Bake in the preheated oven for 20-25 minutes, or until the edges are golden brown.
- Once baked, transfer the macaroons to a wire rack to cool completely.
Tips:
To add a touch of elegance to your coconut macaroons, consider drizzling them with melted chocolate after they’ve cooled. This not only adds a festive flair but also complements the coconut flavor beautifully.
Additionally, if you find the mixture too sticky to handle, wetting your hands slightly can make shaping the mounds easier. Enjoy your macaroons as they are, or get creative by adding a pinch of salt or a dash of almond extract for a unique twist.
Fruitcake Bites
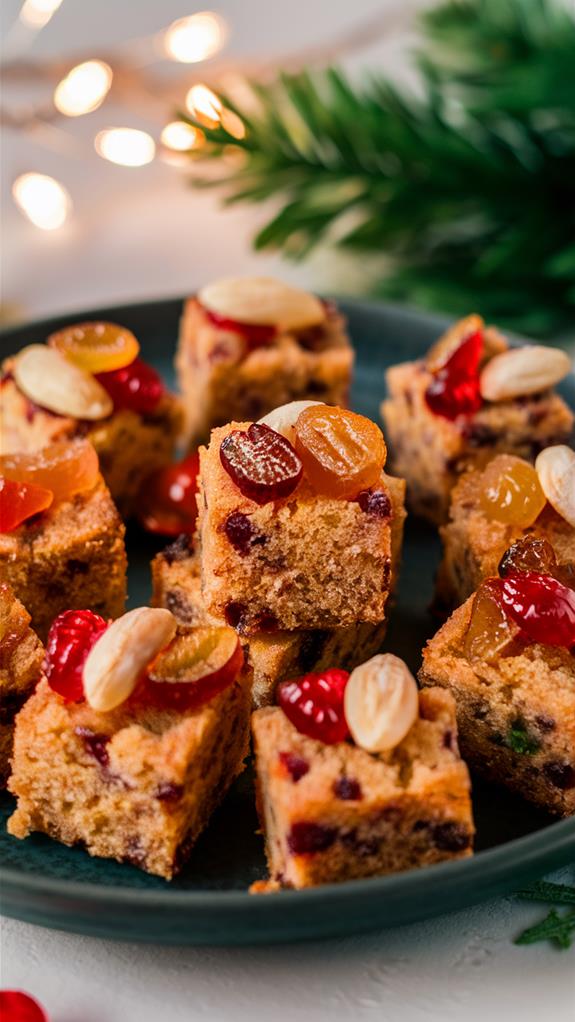
Fruitcake bites are a delightful twist on the traditional holiday dessert, offering all the rich, fruity flavors of a classic fruitcake in a convenient, bite-sized form. These mini treats are perfect for holiday gatherings and are sure to be a hit with those who enjoy the combination of dried fruits, nuts, and spices.
Easy to make and even easier to share, fruitcake bites are a festive addition to any holiday dessert spread.
Plus, their manageable size ensures that you can indulge in the rich flavors of fruitcake without feeling overwhelmed.
Ingredients:
- 1 cup raisins
- 1 cup currants
- 1/2 cup candied citrus peel
- 1 cup chopped walnuts or pecans
- 1 1/2 cups all-purpose flour
- 1/2 cup unsalted butter, softened
- 1 cup granulated sugar
- 2 large eggs
- 1 teaspoon ground cinnamon
- 1/2 teaspoon ground nutmeg
Cooking Instructions:
- Preheat your oven to 350°F (175°C).
- Chop the dried fruits and candied citrus peel into small pieces.
- In a large bowl, mix together the chopped fruits and nuts.
- In another bowl, cream the softened butter and sugar until light and fluffy.
- Beat in the eggs, one at a time, mixing well after each addition.
- Gradually add the flour, cinnamon, and nutmeg to the wet ingredients, mixing until just combined.
- Fold the fruit and nut mixture into the batter until evenly distributed.
- Spoon the batter into mini muffin tins or small molds, filling each about two-thirds full.
- Bake for 15-20 minutes, or until the bites are golden and firm to the touch.
- Let the fruitcake bites cool in the pan for a few minutes, then transfer them to a wire rack to cool completely.
Extra Tips:
When making fruitcake bites, feel free to experiment with different dried fruits and nuts to suit your taste. If you prefer a more moist texture, consider adding a tablespoon of orange juice or rum to the batter.
Additionally, keep an eye on the baking time, as ovens can vary; you want the bites to be firm but not overly dry. Finally, store any leftovers in an airtight container to keep them fresh and delicious for several days.
Christmas Tiramisu
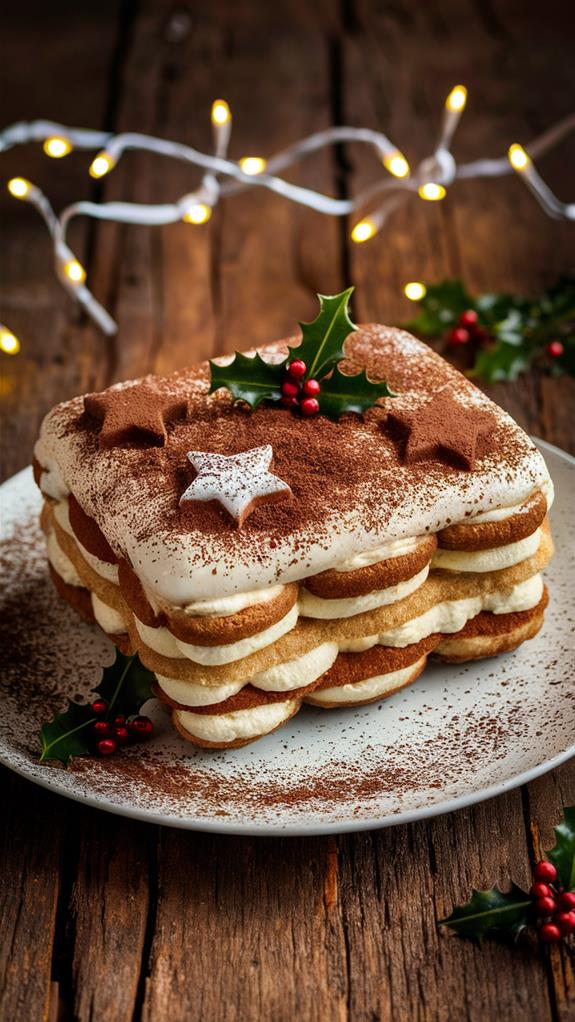
Christmas Tiramisu is a delightful twist on the classic Italian dessert that brings the warmth and spices of the holiday season to your table. This version maintains the beloved layers of coffee-soaked ladyfingers and creamy mascarpone cheese, but introduces festive elements like cinnamon and nutmeg to elevate the experience.
It’s a dessert that promises to enchant your guests with every spoonful, offering a cozy and celebratory taste of the holidays. Imagine indulging in the rich flavors of espresso paired with a splash of Marsala wine or brandy, perfectly balanced by the creamy mascarpone filling.
The addition of cinnamon and nutmeg adds a comforting warmth, making this tiramisu a perfect centerpiece for any holiday menu. Not only will it impress your guests with its elegant presentation, but it also captivates with the harmonious blend of traditional and seasonal flavors.
Ingredients:
- 1 cup strong brewed coffee, cooled
- 2 tablespoons Marsala wine or brandy
- 3 large egg yolks
- 1/2 cup granulated sugar
- 8 ounces mascarpone cheese
- 1 cup heavy whipping cream
- 1 teaspoon vanilla extract
- 1/2 teaspoon ground cinnamon
- 24 ladyfingers
- 2 tablespoons cocoa powder
- 1/4 teaspoon ground nutmeg
- 2 ounces dark chocolate, grated
Cooking Instructions:
- Prepare the coffee mixture by combining the cooled coffee and Marsala wine or brandy in a shallow dish.
- In a mixing bowl, beat the egg yolks and sugar together until smooth and pale.
- Add the mascarpone cheese to the egg mixture and blend until fully incorporated.
- In a separate bowl, whip the heavy cream until soft peaks form, then gently fold it into the mascarpone mixture.
- Stir in the vanilla extract and cinnamon, ensuring an even distribution of flavors.
- Quickly dip each ladyfinger into the coffee mixture, ensuring they’re soaked but not soggy.
- Layer half of the soaked ladyfingers in the bottom of a serving dish.
- Spread half of the mascarpone mixture over the ladyfingers.
- Repeat the layering process with the remaining ladyfingers and mascarpone mixture.
- Dust the top with cocoa powder and sprinkle a dash of nutmeg.
- Grate dark chocolate over the final layer for an extra festive touch.
- Refrigerate the tiramisu for at least four hours, allowing the flavors to meld.
Extra Tips:
For best results, use fresh, high-quality espresso for the richest flavor, and ensure the mascarpone is at room temperature for easier blending.
When dipping the ladyfingers, a quick submersion is key to avoid them becoming too soggy. If you prefer a non-alcoholic version, simply omit the Marsala wine or brandy.
Letting the tiramisu rest overnight in the refrigerator can enhance the depth of flavors, making it even more delectable when served.
Red Velvet Cupcakes
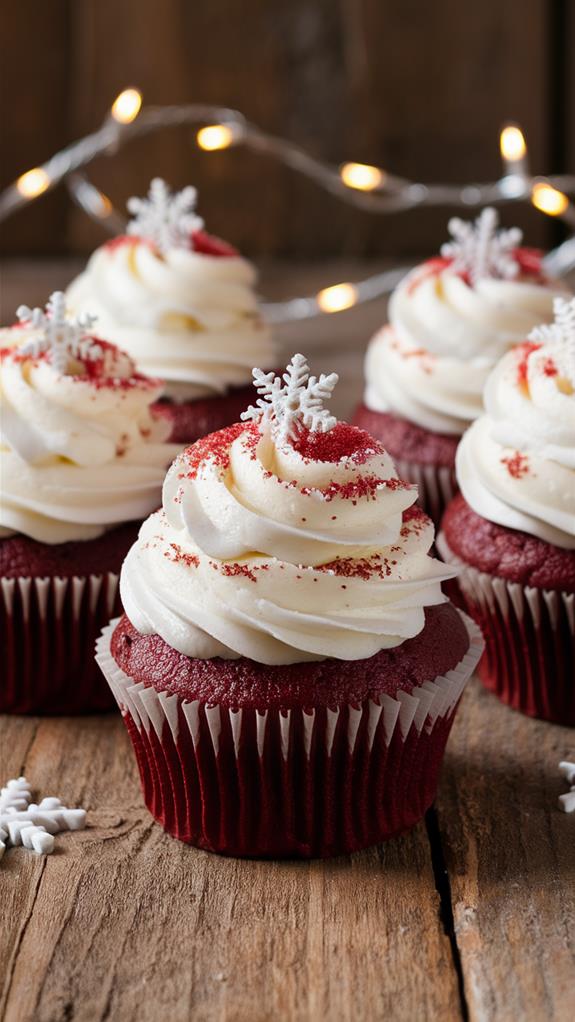
Red Velvet Cupcakes are a delightful addition to any festive occasion, bringing a vibrant burst of color and a touch of elegance to your dessert lineup. These cupcakes are renowned for their deep red hue, which beautifully contrasts with the creamy white frosting, embodying the essence of holiday cheer.
Not only are they a visual treat, but their rich, velvety texture and delicious taste make them a favorite among dessert lovers. These cupcakes offer a modern twist on traditional holiday sweets, providing a unique flavor profile that combines the sweetness of chocolate with the tanginess of cream cheese frosting.
Ingredients:
- 1 ¼ cups all-purpose flour
- 2 tablespoons cocoa powder
- ½ teaspoon baking soda
- ¼ teaspoon salt
- ¾ cup sugar
- 1 large egg
- ½ cup buttermilk
- ½ cup vegetable oil
- 1 teaspoon vanilla extract
- 1 tablespoon red food coloring
Instructions:
- Preheat your oven to 350°F (175°C) and line a cupcake tin with paper liners.
- In a medium bowl, whisk together the flour, cocoa powder, baking soda, and salt.
- In a separate large bowl, beat the sugar and egg until light and fluffy.
- Add the buttermilk, vegetable oil, vanilla extract, and red food coloring to the sugar mixture, mixing until well combined.
- Gradually add the dry ingredients to the wet ingredients, stirring until the batter is smooth and well incorporated.
- Evenly distribute the batter into the prepared cupcake tin, filling each liner about two-thirds full.
- Bake in the preheated oven for 18-20 minutes or until a toothpick inserted into the center of a cupcake comes out clean.
- Allow the cupcakes to cool completely on a wire rack before frosting with cream cheese icing.
Extra Tips:
For optimal results, ensure all your ingredients are at room temperature before beginning. This will help the batter mix more evenly and result in a smoother texture.
When adding the red food coloring, start with a little, and add more if needed to achieve the desired shade. Be careful not to overmix the batter once the dry ingredients are added, as this can lead to dense cupcakes.
Enjoy your Red Velvet Cupcakes with a sprinkle of festive decorations for an extra touch of holiday magic!
Shortbread Stars
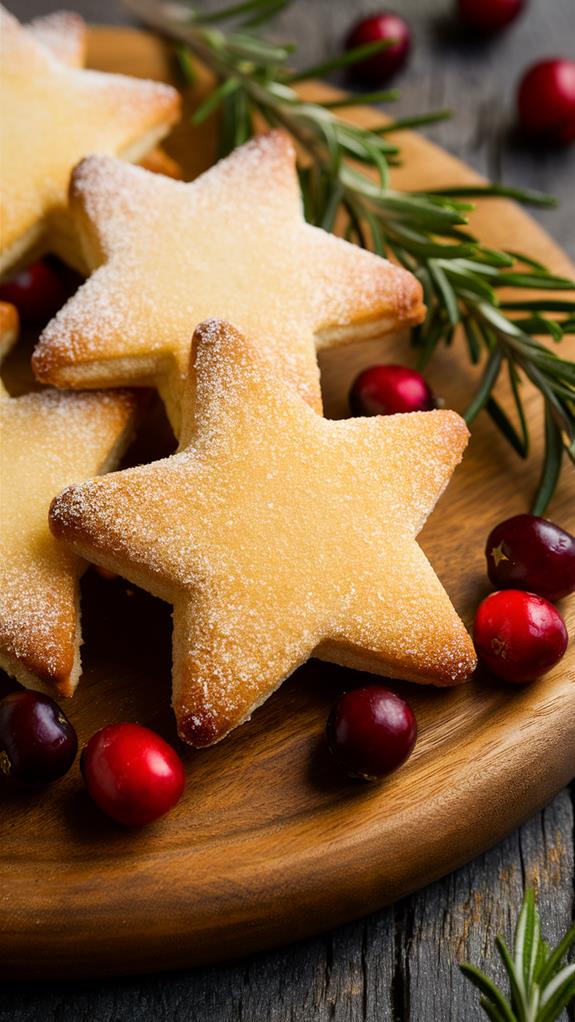
Shortbread Stars are a timeless classic that add a touch of elegance to any holiday gathering. These cookies are cherished for their buttery flavor and delicate texture, making them a festive favorite.
The beauty of Shortbread Stars lies in their versatility and minimalistic ingredients. With just a few pantry staples, you can evoke the spirit of Christmas and delight your guests.
The dough is easy to work with, and using a star-shaped cookie cutter adds a whimsical touch to these beloved cookies. Perfect for sharing, these treats bring smiles and joy to all who indulge.
Ingredients:
- 1 cup (227g) unsalted butter, softened
- 1/2 cup (100g) granulated sugar
- 2 cups (240g) all-purpose flour
- 1/4 teaspoon salt
- Powdered sugar (optional, for dusting)
- Melted chocolate (optional, for dipping)
Cooking Instructions:
- Preheat your oven to 325°F (160°C) and line a baking sheet with parchment paper.
- In a large bowl, cream together the softened butter and granulated sugar until the mixture is light and fluffy.
- In a separate bowl, mix the all-purpose flour and salt.
- Gradually add the flour mixture to the butter and sugar mixture, stirring until a dough forms.
- On a floured surface, roll out the dough to about a quarter-inch thickness.
- Use a star-shaped cookie cutter to cut out the cookies and place them on the prepared baking sheet, leaving some space between each one.
- Bake for about 15 minutes, or until the edges are just golden.
- Allow the cookies to cool on the baking sheet for a few minutes before transferring them to a wire rack to cool completely.
- Optional: Dust the cooled cookies with powdered sugar for a snowy effect or dip one side in melted chocolate for added decadence.
Extra Tips:
To ensure the best texture, make sure your butter is softened, not melted, before starting the recipe.
Chilling the dough for about 15 minutes before rolling can make it easier to handle and help the cookies hold their shape during baking.
If you choose to dip the cookies in chocolate, allow the chocolate to set completely before serving to avoid any mess.
Enjoy customizing your Shortbread Stars with different decorations to suit your festive theme!
Peanut Butter Blossoms

Peanut Butter Blossoms are a beloved treat that beautifully combines the rich, nutty flavor of peanut butter with the sweetness of a chocolate kiss. These cookies aren’t only a staple during the holiday season but are also perfect for any time you crave a sweet and savory delight.
Their soft and chewy texture, paired with the smooth chocolate topping, makes them an irresistible indulgence.
What makes Peanut Butter Blossoms truly special is their simplicity. With just a handful of ingredients, you can create a batch of these delicious cookies in no time.
They’re a fantastic way to get everyone in the family involved in baking, as kids can have fun rolling the dough and pressing the chocolate kisses into the warm cookies.
Ingredients:
- 1 cup peanut butter
- 1 cup granulated sugar
- 1 1/4 cups all-purpose flour
- 1 large egg
- 1 teaspoon baking soda
- Chocolate kisses (approximately 24 pieces)
Cooking Instructions:
- Preheat your oven to 350°F (175°C).
- In a large mixing bowl, combine peanut butter, granulated sugar, flour, egg, and baking soda until a smooth dough forms.
- Roll the dough into 1-inch balls and place them onto an ungreased baking sheet, spaced about 2 inches apart.
- Bake in the preheated oven for 8-10 minutes or until the edges are set and lightly golden.
- Remove the cookies from the oven and immediately press a chocolate kiss into the center of each cookie while they’re still warm.
- Allow the cookies to cool on the baking sheet for 5 minutes before transferring them to a wire rack to cool completely.
For the best results, make sure your chocolate kisses are unwrapped and ready to go before you begin baking. This ensures you can press them into the cookies while they’re still warm, helping the chocolate to adhere perfectly.
If you want to add a festive touch, consider rolling the dough balls in colored sugar before baking. Enjoy these delightful treats with a glass of milk or a hot cup of cocoa for a truly comforting experience!
Holiday Brownies
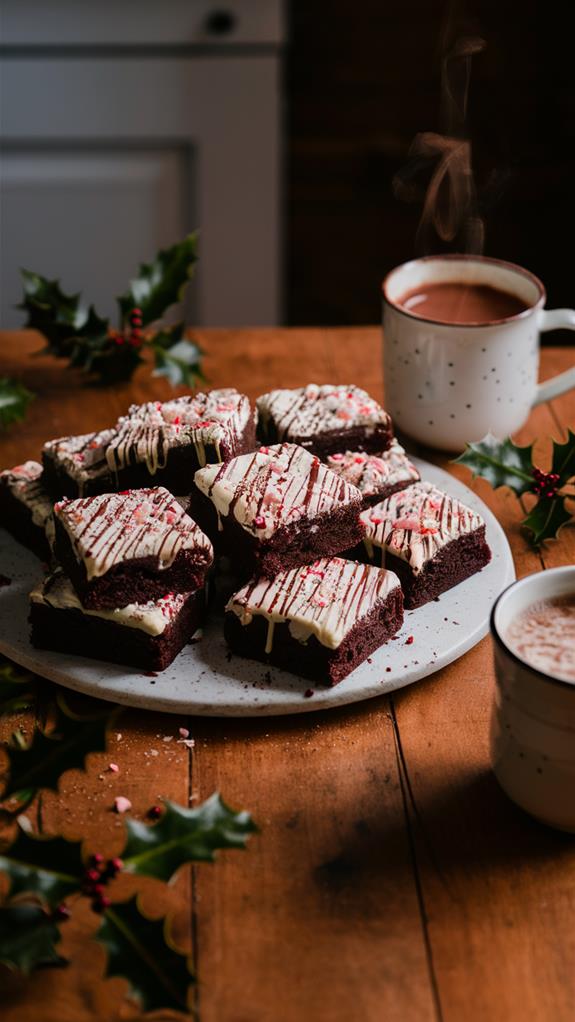
Holiday brownies are a quintessential treat that brings warmth and joy to any festive occasion. Their rich, fudgy texture combined with chocolatey goodness makes them impossible to resist.
Not only are holiday brownies easy to prepare, but they also offer the perfect opportunity to get creative with festive additions. Start with a classic brownie mix or your favorite homemade recipe, and elevate the taste by incorporating a hint of vanilla extract or a dash of cinnamon.
To capture the essence of the season, consider topping them with crushed peppermint candies or mini marshmallows before baking for a touch of holiday cheer.
Ingredients:
- 1 box of brownie mix (or homemade brownie recipe ingredients)
- 1 teaspoon vanilla extract
- 1/2 teaspoon cinnamon
- 1/2 cup crushed peppermint candies or mini marshmallows
- 1/2 cup melted white chocolate or caramel (optional for drizzling)
Instructions:
- Preheat your oven according to the brownie mix or homemade recipe instructions.
- Prepare the brownie batter as directed on the box or in your recipe.
- Stir in the vanilla extract and cinnamon until well combined.
- Pour the batter into a greased baking dish.
- Sprinkle crushed peppermint candies or mini marshmallows evenly over the top of the batter.
- Bake the brownies according to the recommended time and temperature.
- Once baked, remove them from the oven and let them cool completely in the pan.
- Use a sharp knife to cut the cooled brownies into squares. For creative shapes, use cookie cutters.
- If desired, drizzle melted white chocolate or caramel over the top for added decoration.
As you prepare these holiday brownies, remember that letting them cool completely is crucial for clean and precise cuts.
For an added touch of festivity, dust the serving platter with powdered sugar to mimic a snowy landscape. Pairing the brownies with vanilla ice cream or whipped cream can create a delightful contrast of textures and flavors.
Enjoy sharing this holiday treat with your loved ones, creating memories that are as sweet as the brownies themselves!
Spiced Apple Crisp
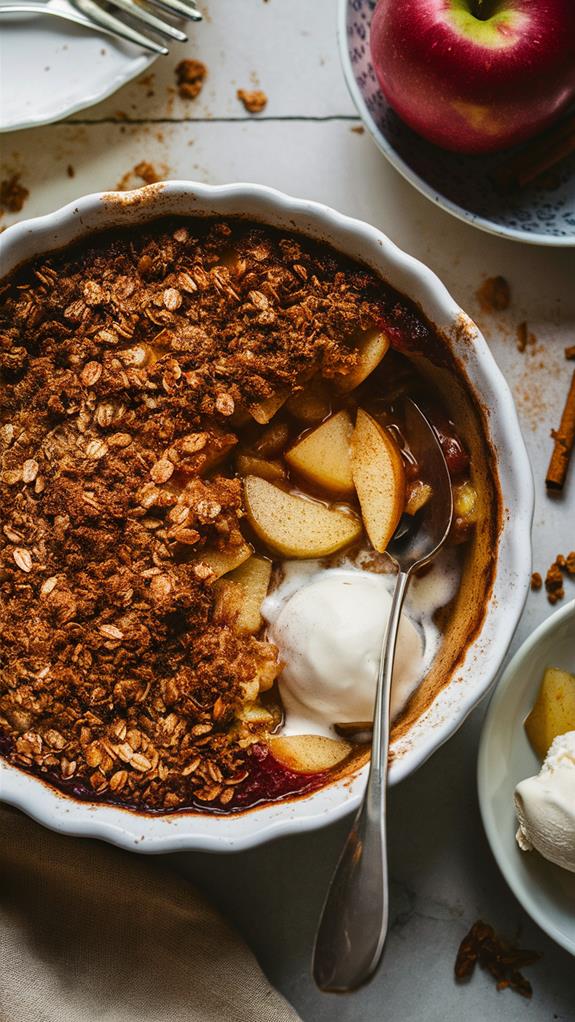
As the holiday festivities come to a close, it’s the perfect time to indulge in a delightful dessert that truly captures the essence of the season: Spiced Apple Crisp. This classic dish features tender apples infused with warm spices like cinnamon, nutmeg, and a touch of clove, all topped with a crisp, buttery layer that adds a delicious contrast.
The inviting aroma of this dessert as it bakes will fill your home with a cozy, holiday fragrance. Spiced Apple Crisp is a straightforward yet satisfying dessert that showcases the natural sweetness of apples, enhanced by a carefully balanced blend of spices.
Ideal for gatherings or a quiet evening at home, this dish is best served warm, perhaps with a scoop of vanilla ice cream or a dollop of whipped cream, making it a comforting treat that everyone will love.
Ingredients:
- 6 cups Granny Smith apples, peeled, cored, and sliced
- 1/4 cup brown sugar
- 1 teaspoon ground cinnamon
- 1/2 teaspoon ground nutmeg
- 1/4 teaspoon ground clove
- 1 cup rolled oats
- 1/2 cup all-purpose flour
- 1/2 cup brown sugar
- 1/2 cup cold, cubed butter
Instructions:
- Preheat your oven to 350°F (175°C).
- In a large bowl, combine the sliced apples with 1/4 cup brown sugar, cinnamon, nutmeg, and clove. Toss until the apples are well coated.
- Spread the spiced apples evenly in a baking dish.
- In another bowl, mix together the oats, flour, and 1/2 cup brown sugar.
- Add the cold, cubed butter to the oat mixture.
- Use your fingers to blend the butter into the dry ingredients until the mixture resembles coarse crumbs.
- Evenly distribute the topping over the apples in the baking dish.
- Bake in the preheated oven for 35-40 minutes, or until the topping is golden brown and the apples are tender.
- Remove from the oven and let it cool slightly before serving.
Extra Tips:
For the best results, choose apples that are firm and slightly tart, like Granny Smiths, to balance the sweetness of the topping. If you prefer a sweeter crisp, consider mixing in different types of apples, such as Honeycrisp or Fuji.
To add a bit of crunch, you can include nuts like pecans or walnuts in the topping mixture. Remember, the key to a perfect apple crisp is ensuring that the topping is evenly distributed and baked until golden and crisp.
Enjoy your Spiced Apple Crisp fresh out of the oven for the ultimate holiday dessert experience.
Almond Biscotti
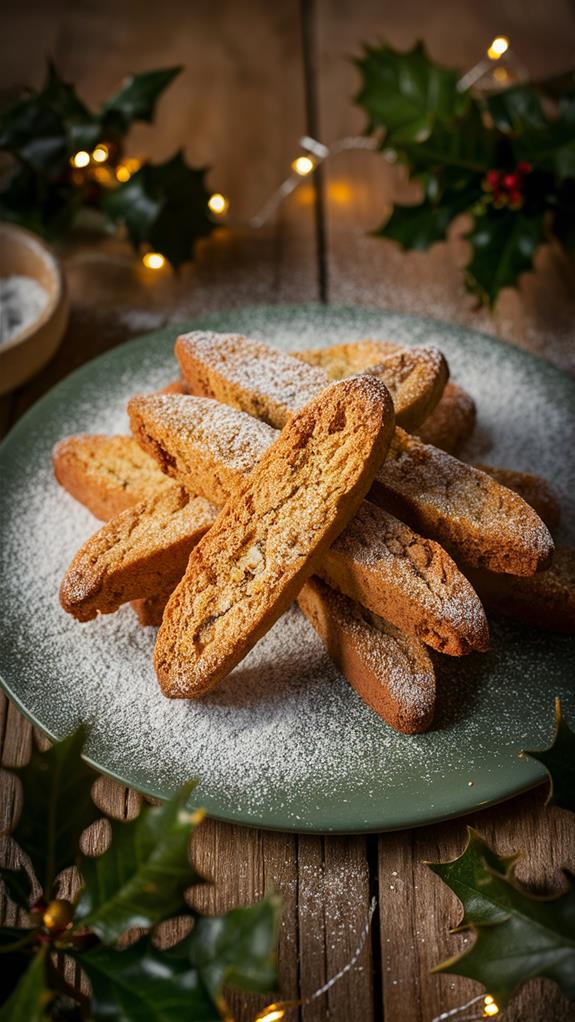
Indulge in the rich tradition of holiday baking with Almond Biscotti, a classic Italian cookie that’s both crunchy and invitingly flavorful. Perfect for dunking in a warm mug of your favorite beverage, these delightful treats bring an irresistible blend of nutty goodness and crisp texture to any dessert spread.
Crafting these twice-baked cookies is a straightforward process that yields delicious results with minimal effort. The combination of whole almonds for that distinctive crunch and a hint of vanilla creates a depth of flavor that’s both comforting and elegant.
With just a few simple steps, you can prepare a batch of these delectable cookies that are perfect for both sharing and gifting.
Ingredients:
- 2 cups all-purpose flour
- 1 cup granulated sugar
- 1 teaspoon baking powder
- 1 cup whole almonds
- 1 teaspoon vanilla extract
- 3 large eggs
Cooking Instructions:
- Preheat your oven to 350°F (175°C).
- In a large bowl, combine the flour, sugar, and baking powder.
- Stir in the whole almonds.
- Add the vanilla extract.
- Gradually mix in the eggs until a sticky dough forms.
- Divide the dough in half and shape each portion into a log approximately 12 inches long.
- Place the logs on a baking sheet lined with parchment paper and bake for 25-30 minutes until lightly golden.
- Remove from the oven and allow to cool for 10 minutes.
- Using a serrated knife, slice the logs diagonally into ½ inch thick pieces.
- Arrange the slices cut-side down on the baking sheet and bake for an additional 10-15 minutes until crisp and golden.
Extra Tips:
For the best results, ensure that the logs are evenly shaped for consistent cooking.
When slicing the biscotti, use a gentle sawing motion to prevent the delicate cookies from crumbling.
Store the biscotti in an airtight container to maintain their crispiness. They make excellent gifts—just wrap a few in decorative cellophane with a festive ribbon to spread holiday cheer.
Enjoy them with coffee, tea, or hot chocolate for a touch of warmth this season.
Marshmallow Pops
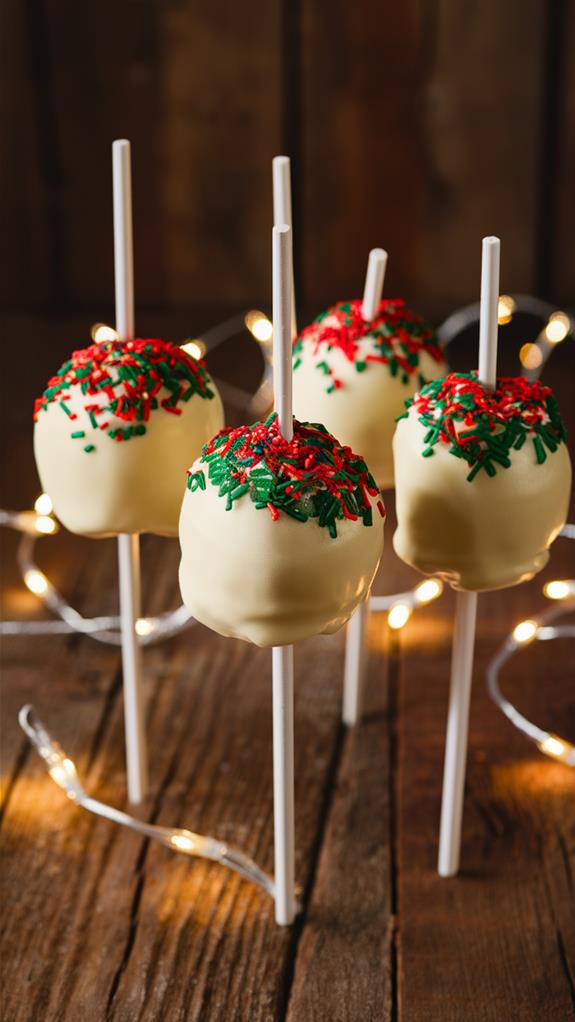
Marshmallow Pops are a whimsical addition to any holiday dessert table, perfect for bringing joy to gatherings of all ages. These delightful treats combine the soft, fluffy texture of marshmallows with the vibrant colors of candy melts and festive sprinkles, creating a visually appealing and sweet indulgence.
Imagine the fun of customizing each marshmallow pop with your choice of holiday-themed colors like red, green, and white, or mixing it up with a rainbow of shades. These treats aren’t only visually stunning but also incredibly tasty, making them a hit among kids and adults alike.
Perfect for gifting, they can be beautifully wrapped in cellophane with a festive ribbon, ready to bring smiles to those who receive them.
Ingredients:
- Large marshmallows
- 1 cup colorful candy melts
- Assorted festive sprinkles
- Lollipop sticks
Instructions:
- Insert a lollipop stick into each marshmallow, ensuring it’s secure.
- Melt the candy coating according to package instructions using a microwave or double boiler.
- Dip each marshmallow into the melted candy, twirling it to ensure an even coating.
- Quickly roll the coated marshmallow in your choice of sprinkles before the candy sets.
- Place the finished pops upright in a foam block or a glass filled with rice to dry completely.
- Once set, wrap them in cellophane and tie with a festive ribbon if desired.
For the best results when making Marshmallow Pops, work quickly once the marshmallows are dipped in the candy coating to ensure the sprinkles adhere well.
If the candy coating begins to harden, you can gently reheat it to maintain a smooth consistency. Additionally, using a foam block or rice-filled glass to hold the pops upright will help them dry evenly and keep their round shape.
Enjoy experimenting with different sprinkle combinations to match your holiday theme, and most importantly, have fun creating these sweet treats!
Pecan Pie Bars
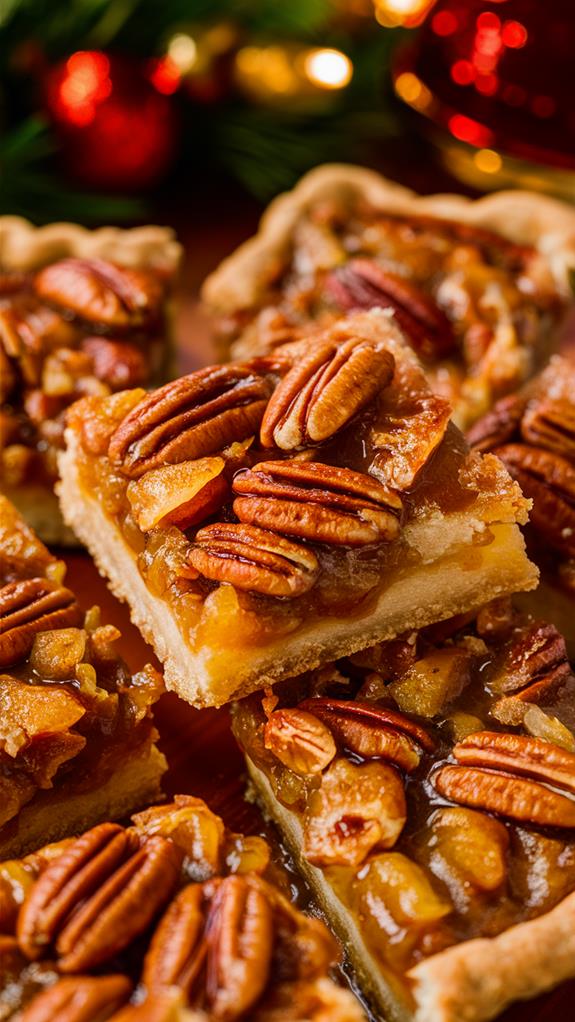
If you’re searching for a delightful treat that effortlessly balances flavor and convenience, look no further than Pecan Pie Bars. These scrumptious bars encapsulate the rich, nutty essence of traditional pecan pie, all in a convenient, hand-held form. Perfect for any occasion, they’re sure to impress at holiday gatherings or provide comfort during a cozy evening with loved ones.
The beauty of Pecan Pie Bars lies in their simplicity and irresistible taste. The buttery shortbread crust forms a sturdy yet tender base, while the gooey pecan filling delivers a satisfying crunch. Each bite harmonizes a blend of sweet and savory, creating a memorable treat that will quickly become a staple in your dessert repertoire.
Ingredients:
- 2 cups all-purpose flour
- 1/2 cup powdered sugar
- 1 cup unsalted butter, softened
- 1 cup brown sugar
- 1 cup corn syrup
- 1/2 cup unsalted butter, melted
- 3 large eggs
- 1 teaspoon vanilla extract
- 2 cups chopped pecans
Cooking Instructions:
- Preheat your oven to 350°F (175°C).
- In a medium bowl, combine the flour, powdered sugar, and softened butter. Mix until the dough comes together.
- Press the dough evenly into a baking pan to form the crust.
- Bake the crust for 15-20 minutes, or until it’s lightly golden. Remove from the oven and let it cool.
- In a separate bowl, whisk together the brown sugar, corn syrup, melted butter, eggs, and vanilla extract to prepare the filling.
- Stir the chopped pecans into the filling mixture.
- Pour the pecan filling evenly over the cooled crust.
- Return to the oven and bake for an additional 30-35 minutes, or until the filling is set.
- Remove from the oven and allow the bars to cool completely before slicing into squares.
Extra Tips:
For the best results, ensure that the bars are completely cool before slicing. This will help achieve clean and neat squares that are perfect for serving.
If you want to elevate the experience, serve the bars with a dollop of whipped cream or a scoop of vanilla ice cream. Additionally, consider toasting the pecans before adding them to the filling for an extra depth of flavor.
Festive Rice Krispies
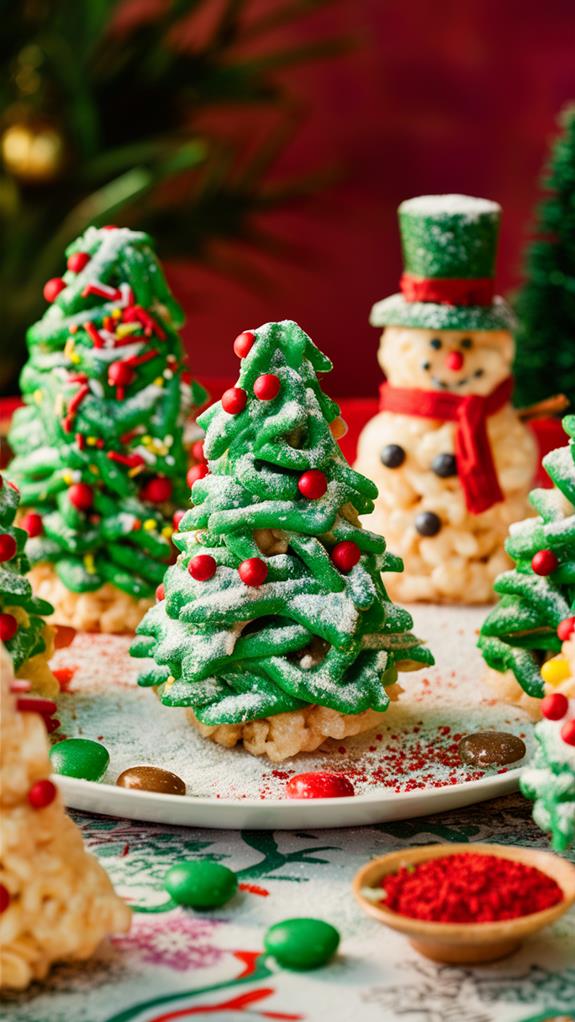
After indulging in the decadence of Pecan Pie Bars, you might find yourself yearning for a treat that’s both lighter and brimming with whimsy. Festive Rice Krispies are the perfect answer, bringing joy and color to your holiday table.
These treats aren’t only simple to prepare but also an excellent opportunity to involve the kids in kitchen activities, making the process as delightful as the result. With their irresistible crunch paired with the creamy marshmallow binding, Festive Rice Krispies offer a playful twist on a classic favorite.
Ingredients:
- 3 tablespoons butter
- 1 package (10 ounces) marshmallows
- 6 cups Rice Krispies cereal
- A few drops red or green food coloring
- Edible glitter or tiny candy pieces (optional)
Cooking Instructions:
- In a large pot, melt 3 tablespoons of butter over low heat.
- Add 1 package (10 ounces) of marshmallows to the melted butter, stirring continuously until fully melted and smooth.
- Remove the pot from heat.
- If desired, add a few drops of red or green food coloring to the melted marshmallow mixture and stir until the color is evenly distributed.
- Quickly add 6 cups of Rice Krispies cereal to the pot, stirring until all pieces are well-coated with the marshmallow mixture.
- Press the mixture evenly into a greased pan.
- Use cookie cutters to shape the mixture into festive designs like stars, trees, or stockings.
- For an added festive touch, sprinkle edible glitter or tiny candy pieces on top while the treats are still sticky.
Extra Tips:
To ensure your Festive Rice Krispies maintain their shape and don’t become too sticky when cutting, let them cool slightly after pressing into the pan.
If the mixture starts to harden before you finish cutting shapes, gently reheat it for a few seconds to soften. For best results, use fresh marshmallows and cereal to achieve the ideal texture and flavor.
